101. Let's Start
UTM Simple/ Tracker;
Register to UTMSimple
Where is the Tracking Code?
What can I Track with UTMSimple?
How can I track UTMs in my optin form?
Can I track custom parameter such as affid?
How can I upgrade my plan?
Is there an onReady method?
- Where is the tracking code?
- What can I track with UTMSimple?
- Which UTMSimple Plan is best for me?
- How can I track UTMs in my optin form?
- Can I track custom parameter such as affid?
- How can I upgrade my plan?
- Is there an onReady method?
- How do I know If I'm tracking?
- How to pass/append UTMs to the URL?
- How to pass/append UTMs to the iframe?
- What If I can't change the field name
- How to change the cookie time?
- What are the some other events?
- Various Known Issues
- Track Facebook within UTMSimple and trigger Events
- I need an invoice
- How to Update Your Billing Information
- UTMsimple Subscription Cancellation Guide
- How to Create a Looker Studio Report in UTMSimple
- Split Testing Guide
- UTMSimple Consent Mode Guide (GDPR)
Where is the tracking code?
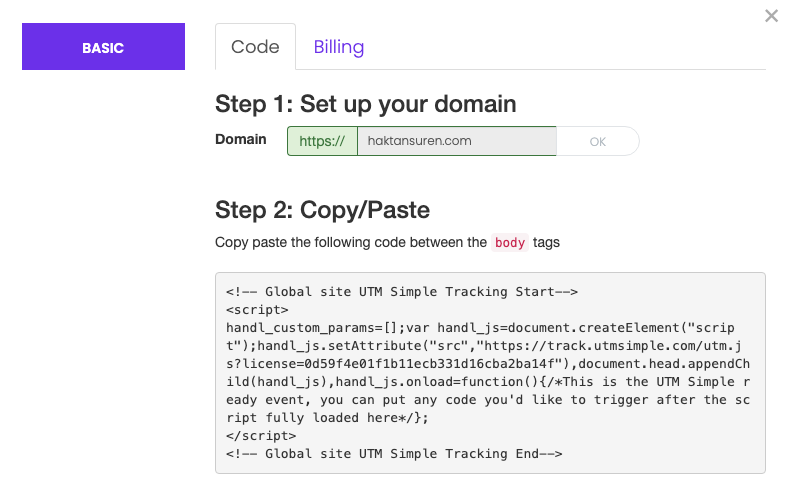
Your tracking code is under My Account.
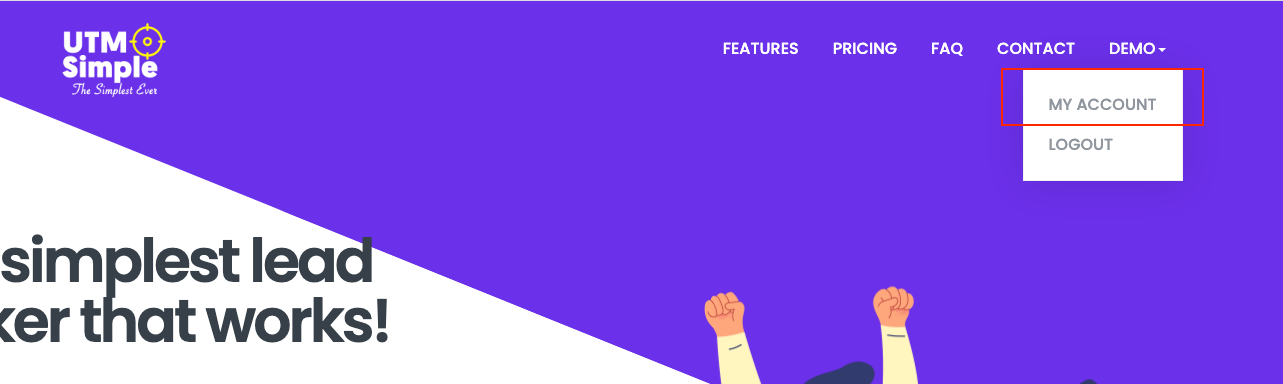
After you type your domain, you will see the code below
What can I track with UTMSimple?
You can track many things in UTMSimple. Here we give the list of most common parameters our clients track.
UTM Parameters (Last Touch)
utm_campaign – utm_campaign variable.
utm_source – utm_source variable.
utm_term – utm_term variable.
utm_medium – utm_medium variable.
utm_content – utm_content variable.
gclid – gclid variable.
fbclid – fbclid variable.
msclkid – fbclid variable.
wbraid - web-to-app measurements
gbraid - app-to-app measurements
_fbc – fbclick ID from Facebook (important for serverside conversion)
_fbp – fbp ID from Facebook (important for serverside conversion)
_ga – GA client id from Google
UTM Parameters (First Touch)
first_utm_campaign – first touch utm_campaign variable.
first_utm_source – first touch utm_source variable.
first_utm_term – first touch utm_term variable.
first_utm_medium – first touch utm_medium variable.
first_utm_content – first touch utm_content variable.
Other UTMSimple Supported Parameters
handl_original_ref - original referral - first touch!
handl_landing_page - landing page - first touch!
handl_ip - ip of the user
handl_ref - last touch referral
handl_ref_domain - last touch referral (domain only)
handl_url - last touch url
handl_url_base - last touch url (domain only)

organic_source_str - organic source (Google, Bing, Instagram etc)
gaclientid - Google Analytics clientid
user_agent - user (browser) agent
traffic_source - Paid, Organic, Direct, Referral, Social

handlID - Unique ID generated by HandL UTM Grabber
Also using handl_custom_params variable you can collect many more parameters included below.
Facebook Ads Related Parameters Facebook Ads Dynamic Parameters
ad_id - Facebook Ad Id
adset_id - Facebook Ads Id
ad_name - Facebook Ads Name
adset_name - Facebook Adset Name
placement - Facebook Placement
//you can add many more using custom paramaters.
Google Ads Related Parameters Google Ads ValueTrack Parameters
campaignid - Google Ads ValueTrack Campaign Id
adgroupid - Google Ads ValueTrack Ads Group Id
keyword - Google Ads ValueTrack Keyword
placement - Google Ads ValueTrack Placement
//you can add many more using custom paramaters.
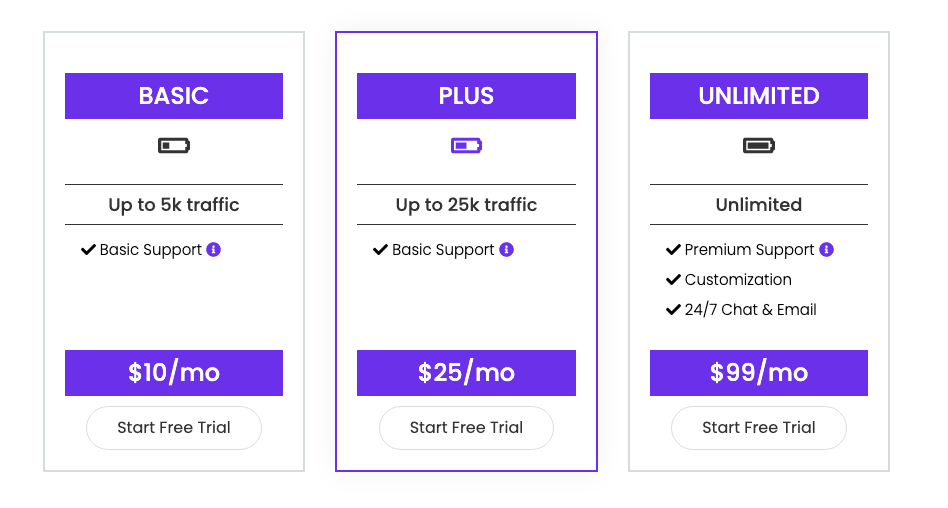
Which UTMSimple Plan is best for me?
We have three plans, Basic, Plus and Unlimited. The primary difference between them about the traffic your website gets monthly.
If you have a traffic up to 5k monthly, then you should pick Basic plan If you have a traffic up to 25k monthly, then you should pick Plus plan If you have a traffic more than 25k monthly, then you should pick Unlimited plan
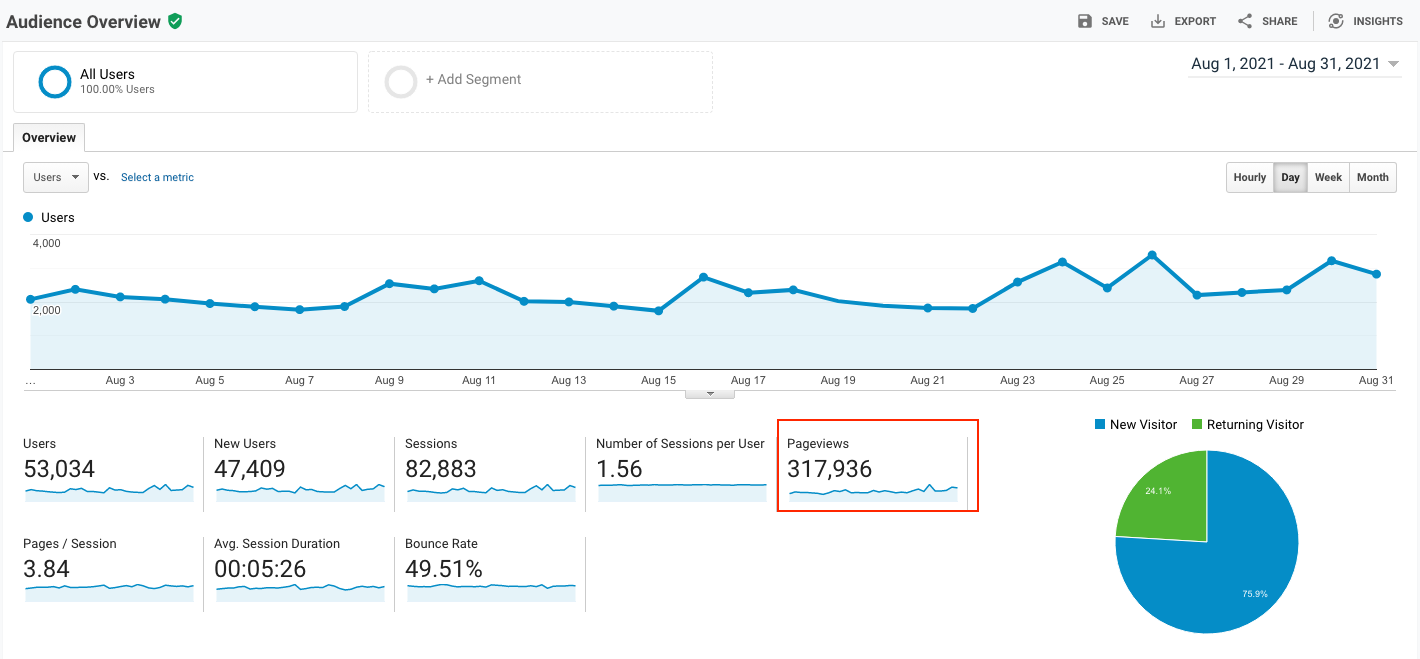
No idea, what your monthly traffic is, go to your Google Analytics. Select Audience > Overview. Make sure you select a one full month (e.g. previous month). And the PageViews is the number you need (see below).
How can I track UTMs in my optin form?
Though this is a very broad question, let's try to answer here. UTMSimple is the simplest and greatest tool that allows tracking UTMs and other trackable data...
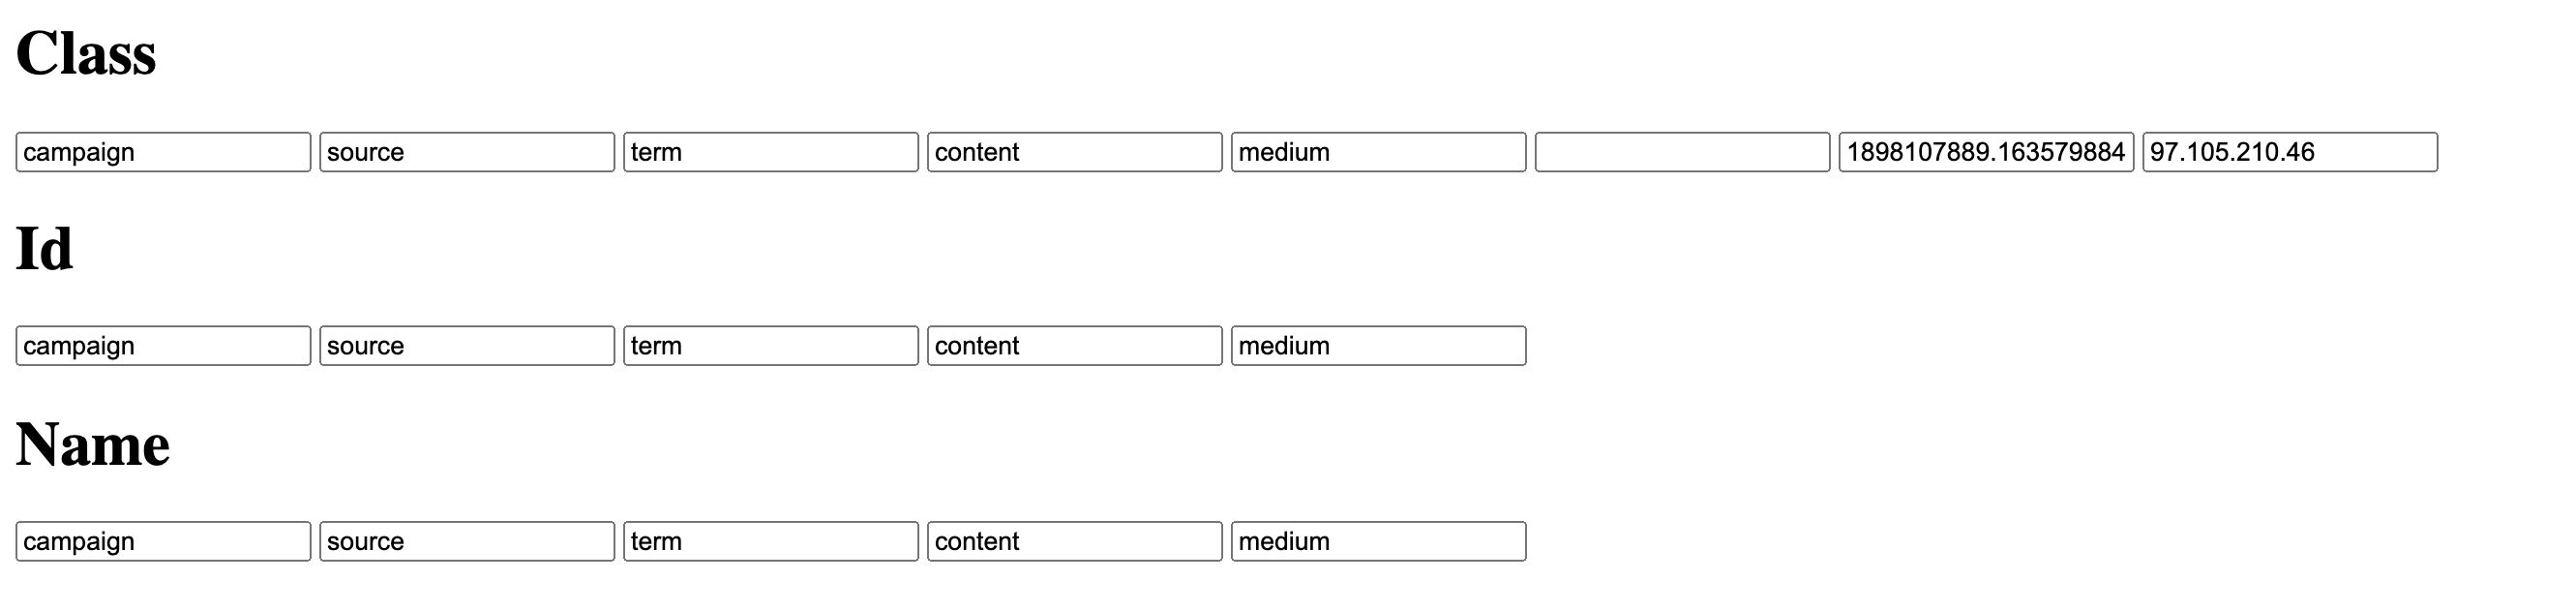
As soon as UTMSimple is activated, script will detect all the UTM related fields in your optin form and autofill them approproately wihout you doing anyting (hence it is THE simplest :) )
For example; if your form field names contain utm_campaign in either id, name or class. It will be filled with value of utm_campaign parameter automatically.
Example HTML Code:
<h1>Class</h1>
<input class="utm_campaign" />
<input class="utm_source" />
<input class="utm_term" />
<input class="utm_content" />
<input class="utm_medium" />
<input class="handl_custom1" />
<input class="gaclientid" />
<input class="handl_ip" />

<h1>Id</h1>
<input id="utm_campaign" />
<input id="utm_source" />
<input id="utm_term" />
<input id="utm_content" />
<input id="utm_medium" />

<h1>Name</h1>
<input name="utm_campaign" />
<input name="utm_source" />
<input name="utm_term" />
<input name="utm_content" />
<input name="utm_medium" />
Once HTML is rendered with UTM Simple
Can I track custom parameter such as affid?
You can track any custom parameters you like such as affid,user_id, id with UTMSimple.
Setting this up is very easy...
Your JavaScript tracker code will look like this..
<!-- Global site UTM Simple Tracking Start-->
<script>
handl_custom_params=[];var handl_js=document.createElement("script");handl_js.setAttribute("src","https://track.utmsimple.com/utm.js?license=<yourkey>"),document.head.appendChild(handl_js),handl_js.onload=function(){/*This is the UTM Simple ready event, you can put any code you'd like to trigger after the script fully loaded here*/};
</script>
<!-- Global site UTM Simple Tracking End-->
As you can notice, there is a parameter called handl_custom_params=[];
This is an array that means it can take multiple values.
Simply add all the custom parameters you'd like to track in there...
handl_custom_params=['affid','user_id','id'];
That's it!
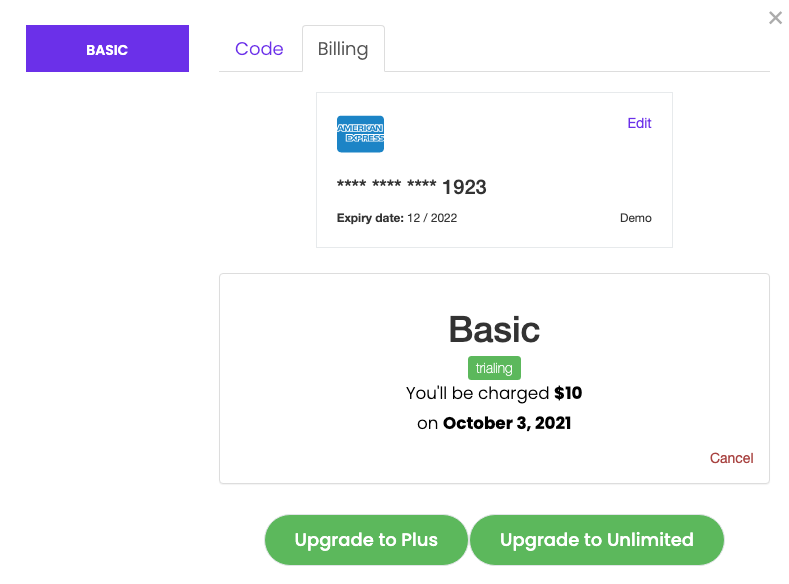
How can I upgrade my plan?
Login to your account at utmsimple.com
Select My Account > Plan > Billing and click the plan name you want to upgrade to. It is that simple :)
Is there an onReady method?
UTMSimple has a handl_js.onload method that you can use to make sure UTMSimple is loaded. This trigger makes sure that all the cookies are captured and ready to be consumed.
<!-- Global site UTM Simple Tracking Start-->
<script>
var handl_custom_params = [];
var handl_js = document.createElement("script");
handl_js.setAttribute("src", "https://track.utmsimple.com/utm.js?license=<license code goes here>"), document.head.appendChild(handl_js),
handl_js.onload = function() {
    /*This is the UTM Simple ready event, you can put any code you'd like to trigger after the script fully loaded here*/
    console.log("I\'m ready")
    console.log("prnting all the cookies")
    console.log(HandL.getAll())
};
</script>
<!--Global site UTM Simple Tracking End -->
How do I know If I'm tracking?
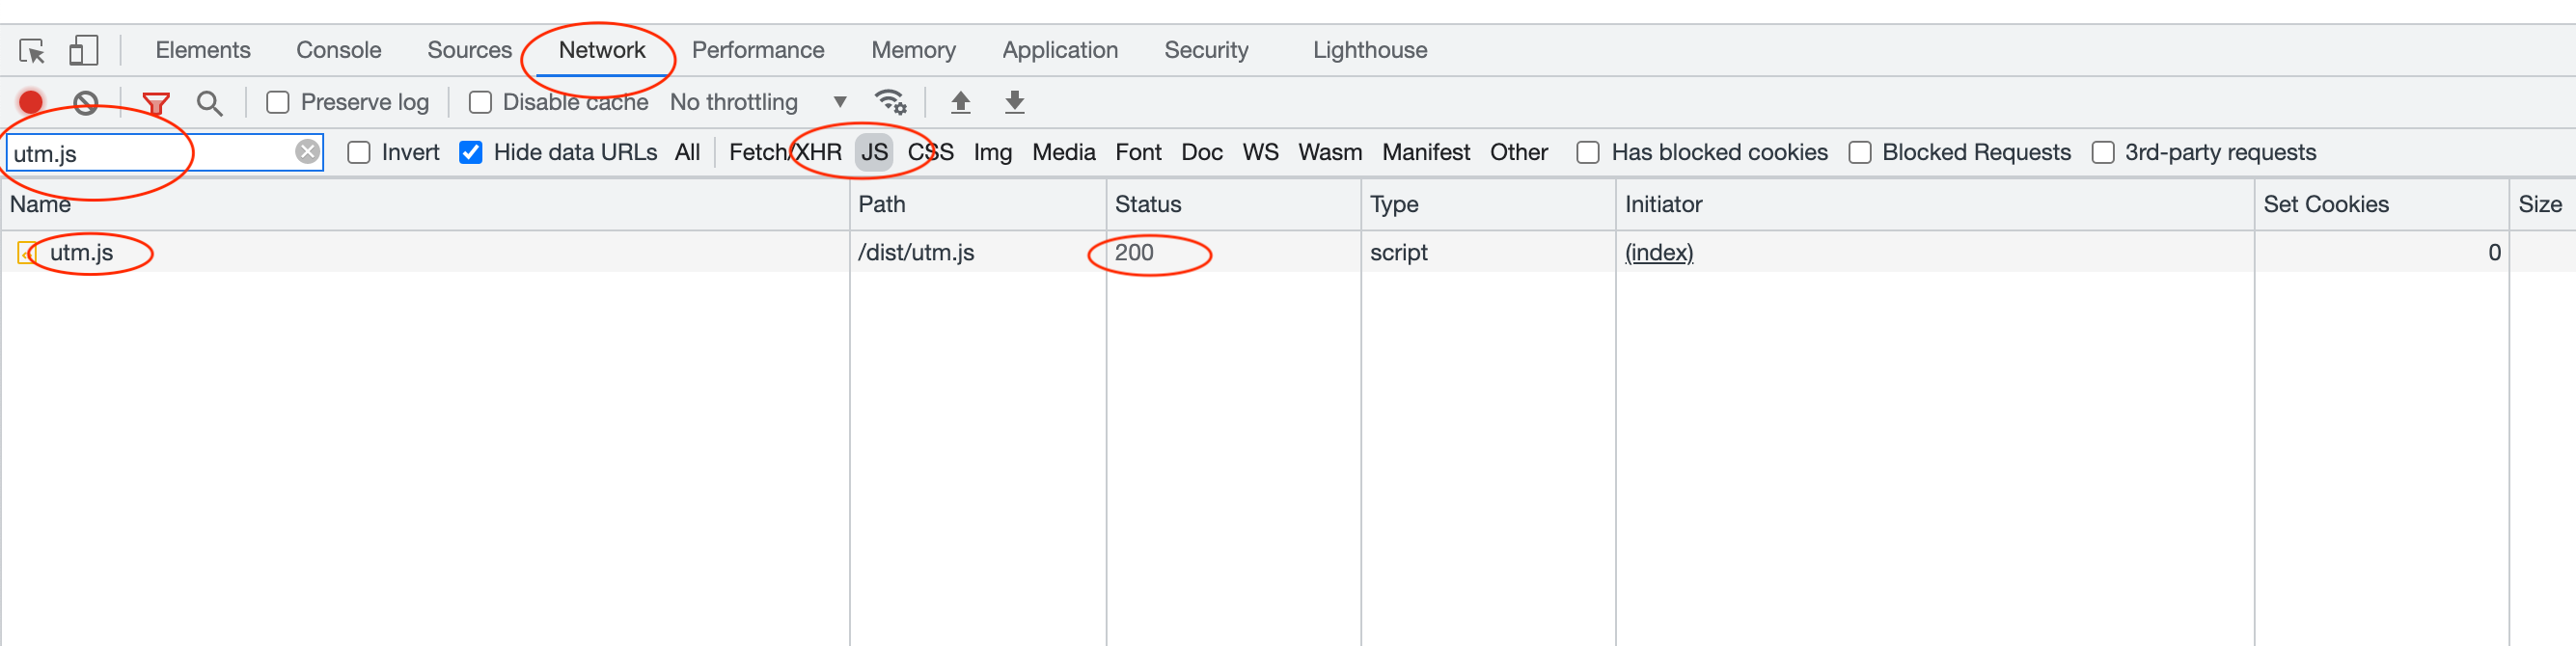
After you embed the code into your site. Go to your favorite browser, and open the "Inspect Editor".
And then, go to Network and click "JS". Refresh the page again and all the resources will be loaded in the pane.
Find utm.js and check the status column. If it says 2xx or 3xx, then you are good to go :)
if you are seeing 4xx or 5xx, please contact with as via chat so we can troubleshoot your account.
How to pass/append UTMs to the URL?
To append UTMs to your links, simply add utm-out class to the links, and UTM Simple will append all the UTM parameters to your link.
For example:
<h2>Link</h2>
<p><a class="utm-out" href="https://www.google.com/?utm_source=googlelink">Google Link</a></p>

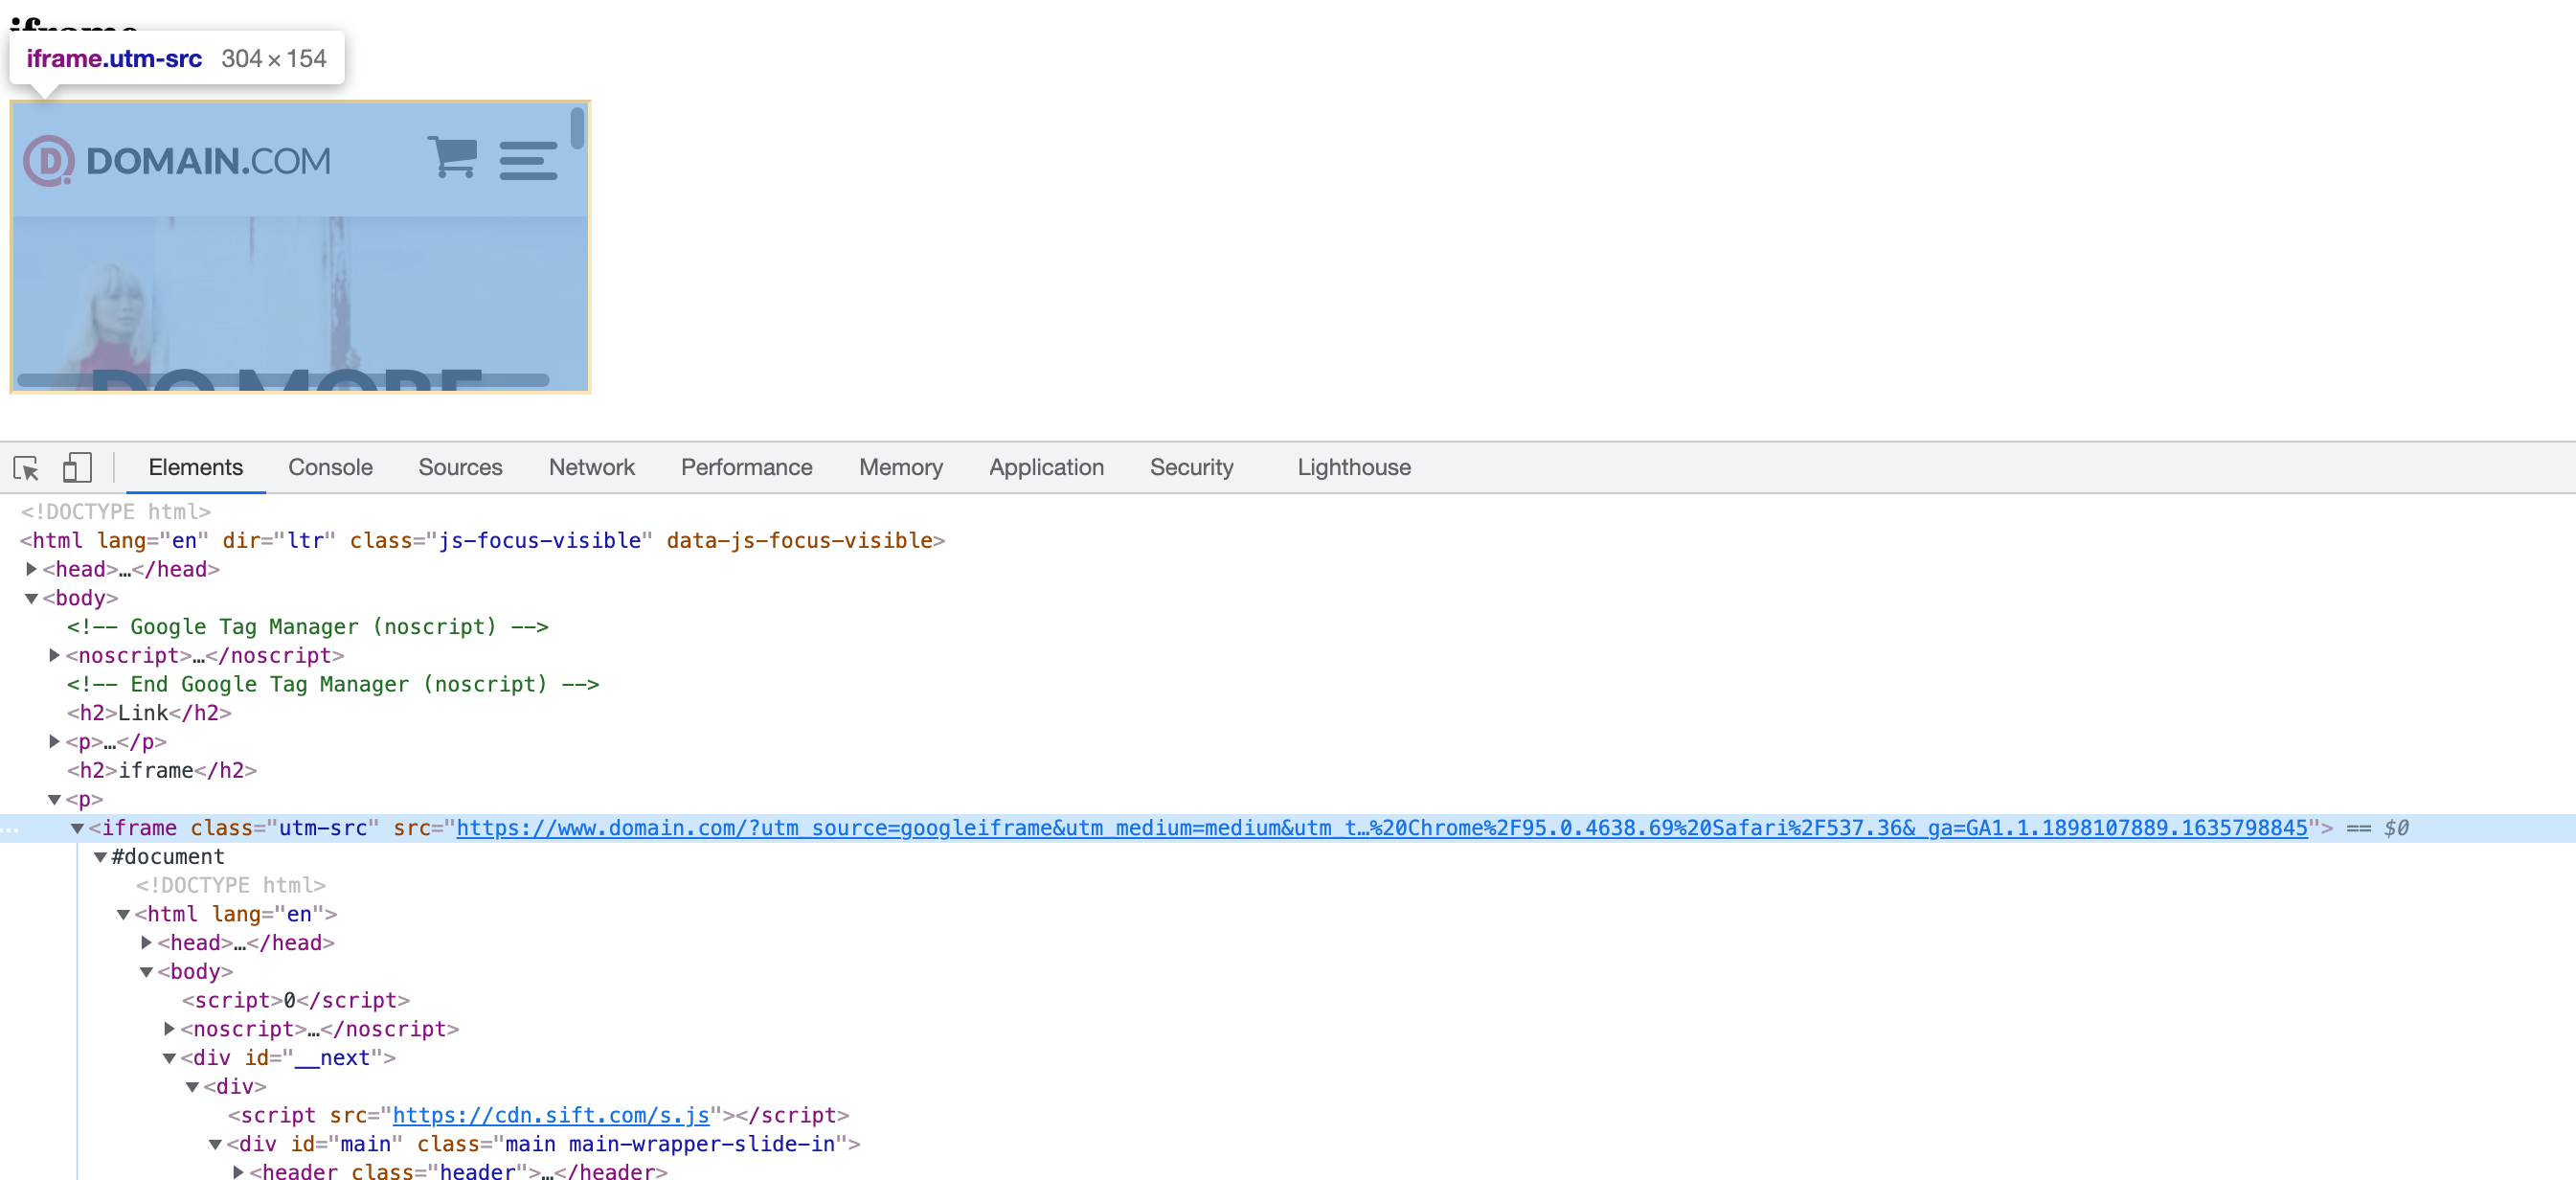
How to pass/append UTMs to the iframe?
To append UTMs to your links, simply add utm-src class to the iframe, and UTM Simple will append all the UTM parameters to your iframe URL.
For example:
<h2>iframe</h2>
<p><iframe class="utm-src" src="https://www.domain.com/?utm_source=googleiframe"></iframe></p>
What If I can't change the field name
We normally reocmmend you to match our naming convention when you include your hidden fields in your form. How can I track UTMs in my optin form?
But we know sometimes this is not feasible. You can't just change the name, id or class of the fields. So, if you want to use different naming convention. You can use the following code:
<script>
handl_custom_params=[];
var handl_js=document.createElement("script");
handl_js.setAttribute("src","https://track.utmsimple.com/utm.js?license=<licensekey>"),
document.head.appendChild(handl_js),
handl_js.onload=function(){
	setTimeout(function(){
		all_params = HandL.getAll()
		mapping = {
			utm_source: ["Question133","Question134"],
			utm_medium: ["Question135","Question136"],
		}
        Object.keys(all_params).map(function(x,y){
        	field_names = mapping[x]
        	if (!Array.isArray(field_names)){
        		field_names = [field_names]
        	}

        	field_names.forEach(function(field_name,y2){
				if (jQuery('#'+field_name).length > 0){
					jQuery('#'+field_name).val(all_params[x]).attr('value',all_params[x]).parent().parent().hide()
				}
        	})

        })
	}, 500);
};
</script>
See the mapping field, this is where you map your new field name. In the example above, the id Question133 and Question134 will be filled by utm_source and Question135 and Question136 will be autofilled by utm_medium.
If you have a different requirement or need help, please have a chat with us.
How to change the cookie time?
If you want to change/overwrite this, please folow the the steps below:
Before you initialize your UTMSimple snippet, define handl_cookie_duration global variable to define your own cookie time.
<script>
    handl_js_license = "<your license key>"
    handl_custom_params = []
    handl_cookie_duration = 365
    var handl_js = document.createElement('script');
    handl_js.setAttribute('src','https://js.utmgrabber.com/utm.js?license='+handl_js_license);
    document.head.appendChild(handl_js);
</script>
In this example, cookies will expire after 365 days later.
What are the some other events?
1. Event: UTMSimpleLoaded
The UTMSimpleLoaded event is fired as soon as the UTM Simple script loads. You can utilize it as follows:
document.querySelector("body").addEventListener("UTMSimpleLoaded", (event) => {
    // Trigger your script here...
});
2. Event: UTMSimpleFBInitCompleted
The UTMSimpleFBInitCompleted event is fired as soon as the Facebook script is initialized:
document.querySelector("body").addEventListener("UTMSimpleFBInitCompleted", (event) => {
    // Trigger your script here...
});
3. Event: UTMSimpleFBEventCompleted
The UTMSimpleFBEventCompleted event is fired as soon as any Facebook event (e.g., Purchase, Lead) is triggered:
document.querySelector("body").addEventListener("UTMSimpleFBEventCompleted", (event) => {
    // Trigger your script here...
});
4. Event: UTMSimpleFB${EventName}Completed
The UTMSimpleFB${EventName}Completed event is fired as soon as a specific Facebook event is triggered. For example, to trigger a script right after a purchase event, use the following:
document.querySelector("body").addEventListener("UTMSimpleFBPurchaseCompleted", (event) => {
    // Trigger your script here...
});
Various Known Issues
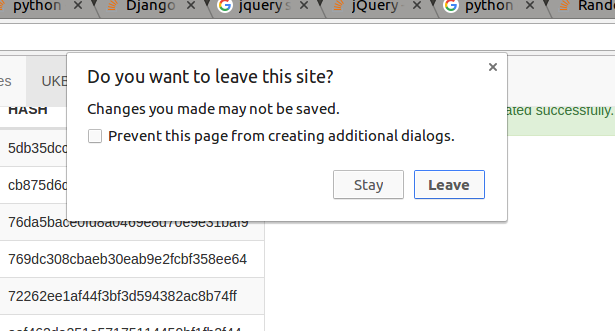
Craft CMS creates dialog when page refreshed or navigated
After implementing our plugin, you might be seing this type of messages popping up "Changes you made may not be saved". This is a known problem with the forms used in Craft CMS.
To fix the problem:
Simply add the following code after page load.
Formie.forms.forEach(function(f) {
	f.removeEventListener('beforeunload')
})
Track Facebook within UTMSimple and trigger Events
You can track Facebook easily and accurately within UTMSimple without using Facebook's own pixel tracking. Details are available here: Facebook Conversion Tracking.
Usage is straightforward. You only need to know your pixel ID and add it to your tracking code as follows: create a variable named fb_pixel_id and assign your pixel ID to it. The code will look like this:
<!-- Global site UTM Simple Tracking Start -->
<script>
    fb_pixel_id = "<YOUR FB PIXEL ID>";
    handl_custom_params = [];
    var handl_js = document.createElement("script");
    handl_js.setAttribute("src", "https://track.utmsimple.com/utm.js?license=<LICENSE KEY>");
    document.head.appendChild(handl_js);
    handl_js.onload = function() {
        /* This is the UTM Simple ready event. You can put any code you'd like to trigger after the script fully loads here. */
    };
</script>
<!-- Global site UTM Simple Tracking End -->
After that, our script will initialize the Facebook pixel and collect all the data for Facebook.
If you want to trigger certain events for Facebook (such as Lead, Add To Cart, Purchase, etc.), you can use the following code:
HandL.sendFBEvent('InitiateCheckout');
HandL.sendFBEvent('Lead', {value: 1, currency: 'USD'});
HandL.sendFBEvent('Purchase', {value: '##total_amount##', currency: 'USD'}, {eventID: '<event_id>'});
By following these steps, you'll effectively track Facebook events using UTMSimple.
I need an invoice
You can download your invoices from utmsimple.com.
Simply log in to your account at utmsimple.com.
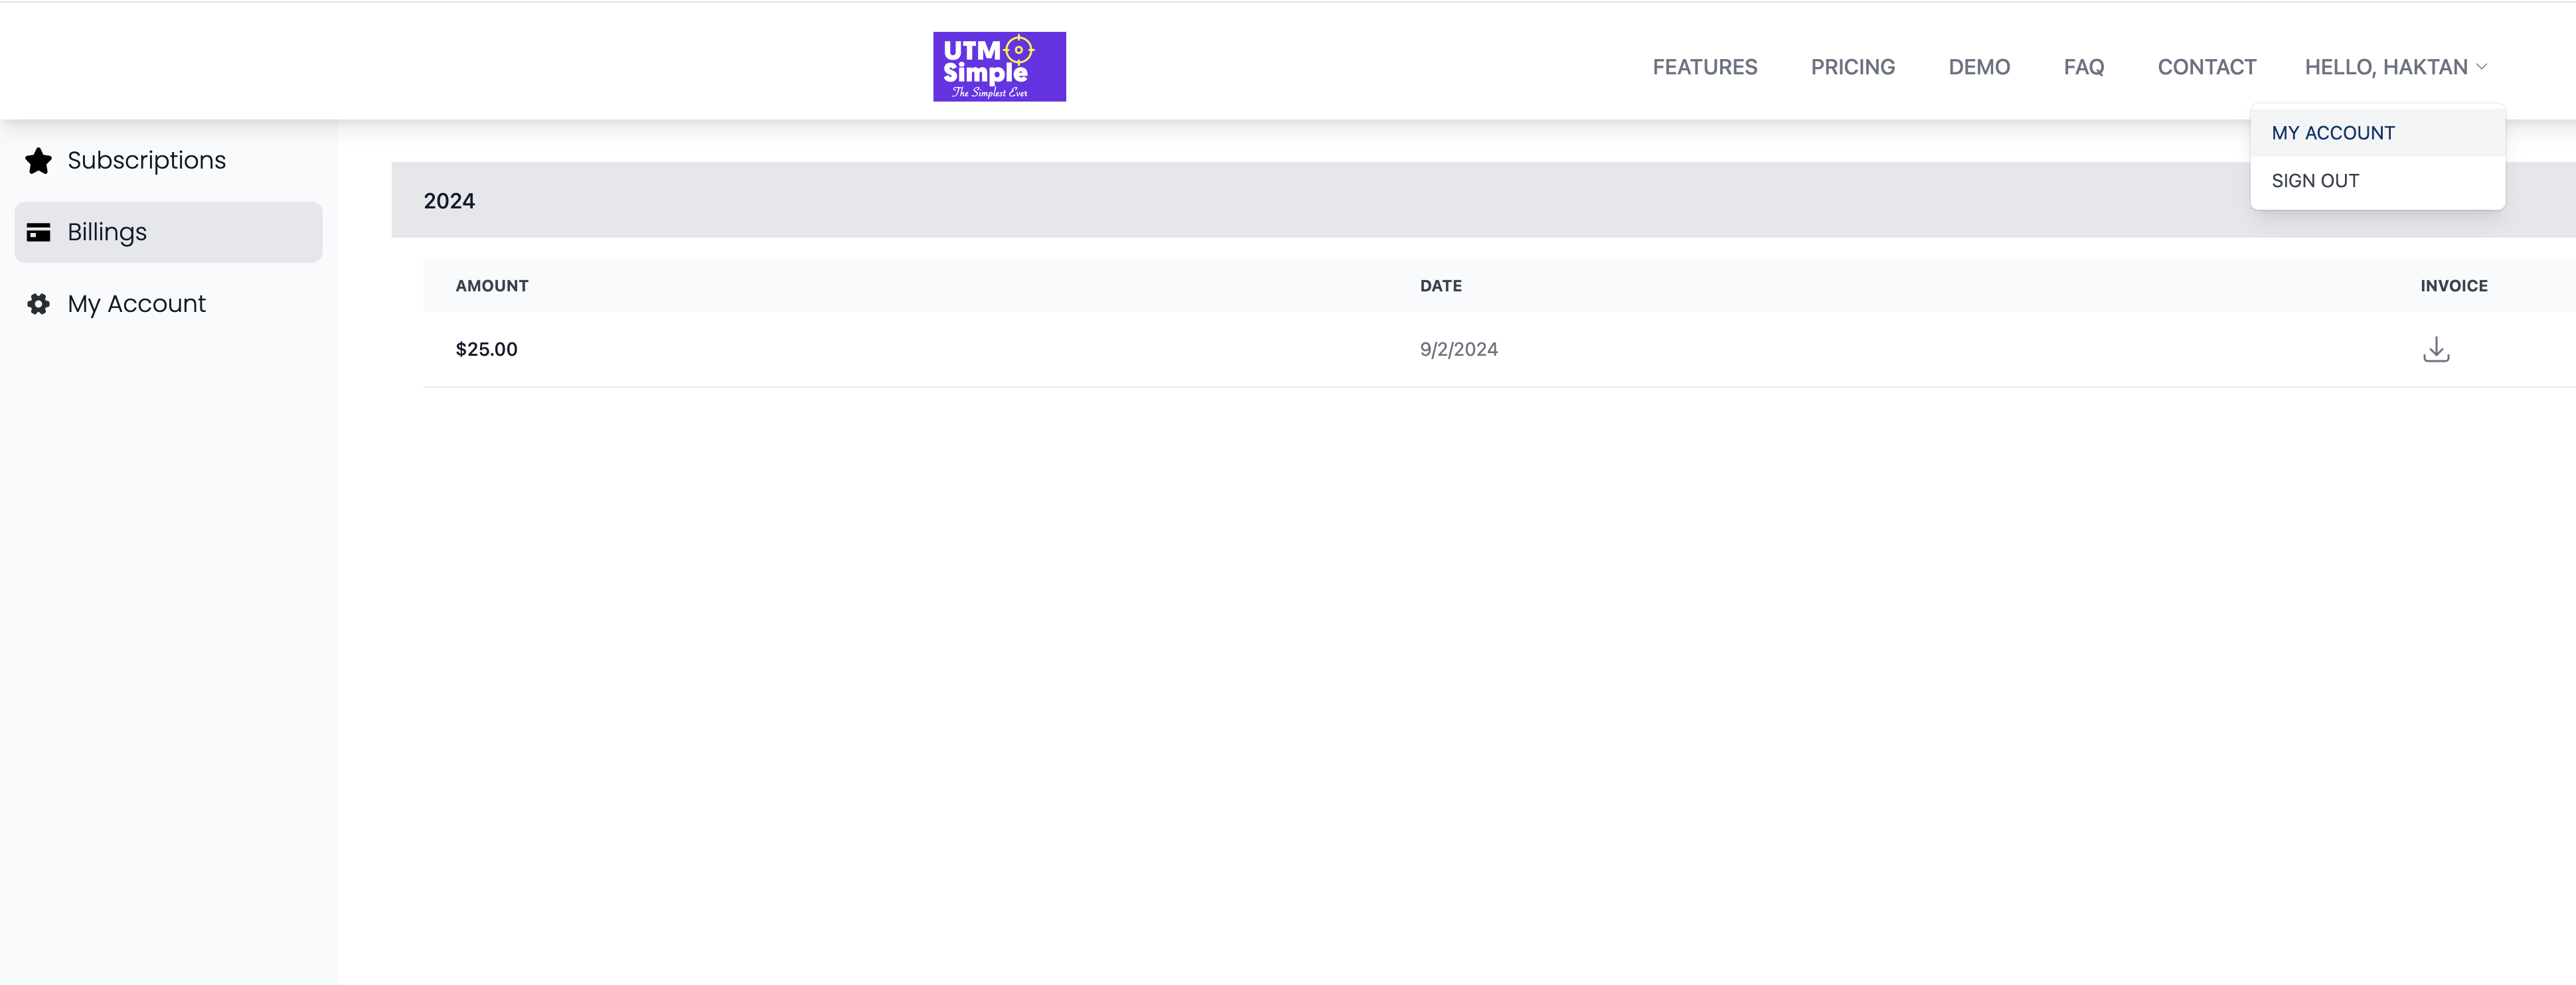
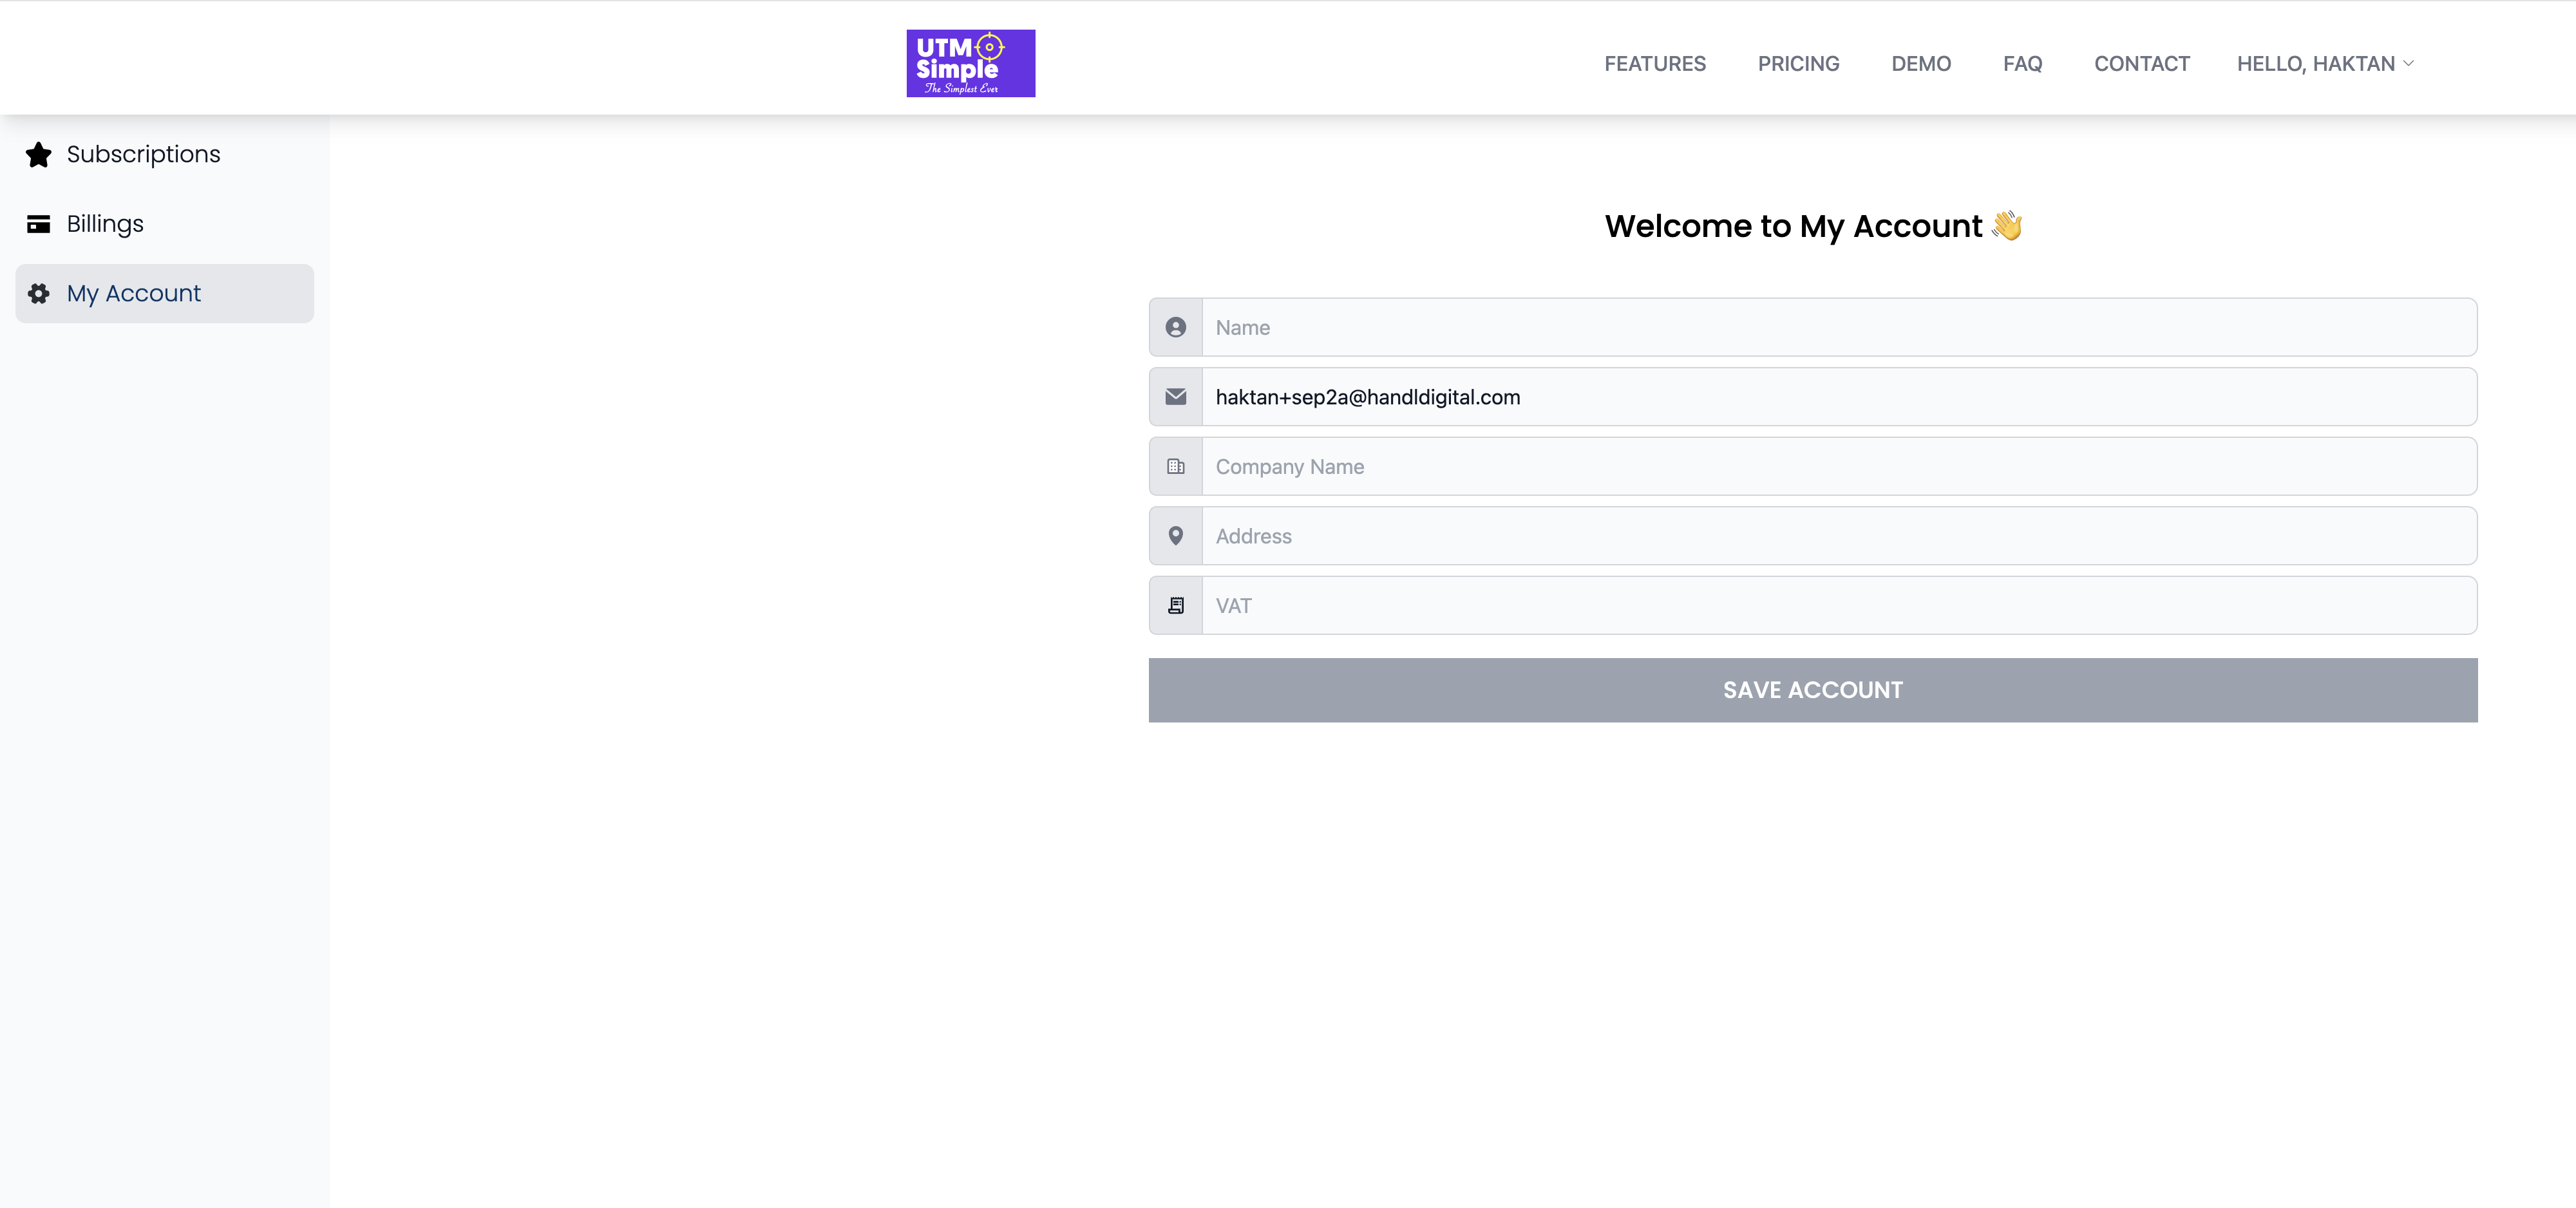
If you need your VAT number on the invoice, please update your information at My Account > My Account, then proceed with downloading the invoice again.
How to Update Your Billing Information
To ensure uninterrupted service, please follow these steps to update your billing information on our site.
Step-by-Step Guide
1. Log In to Your Account
- Go to our website and enter your login credentials.
2. Navigate to the My Account Section
- Once logged in, find and click on "My Account" in the navigation menu on the left side of the page.
3. Access Your Subscription
- Under the "My Account" menu, click on "Subscriptions."
4. Select Your Subscription
- Locate and click on your active subscription. You will see details such as Plan, Terms, Status, etc.
5. Update Billing Information
- Click on the "Billing" tab next to "Code."
- You will see your current payment method and card details.
- Find the "Update Card Details" section.
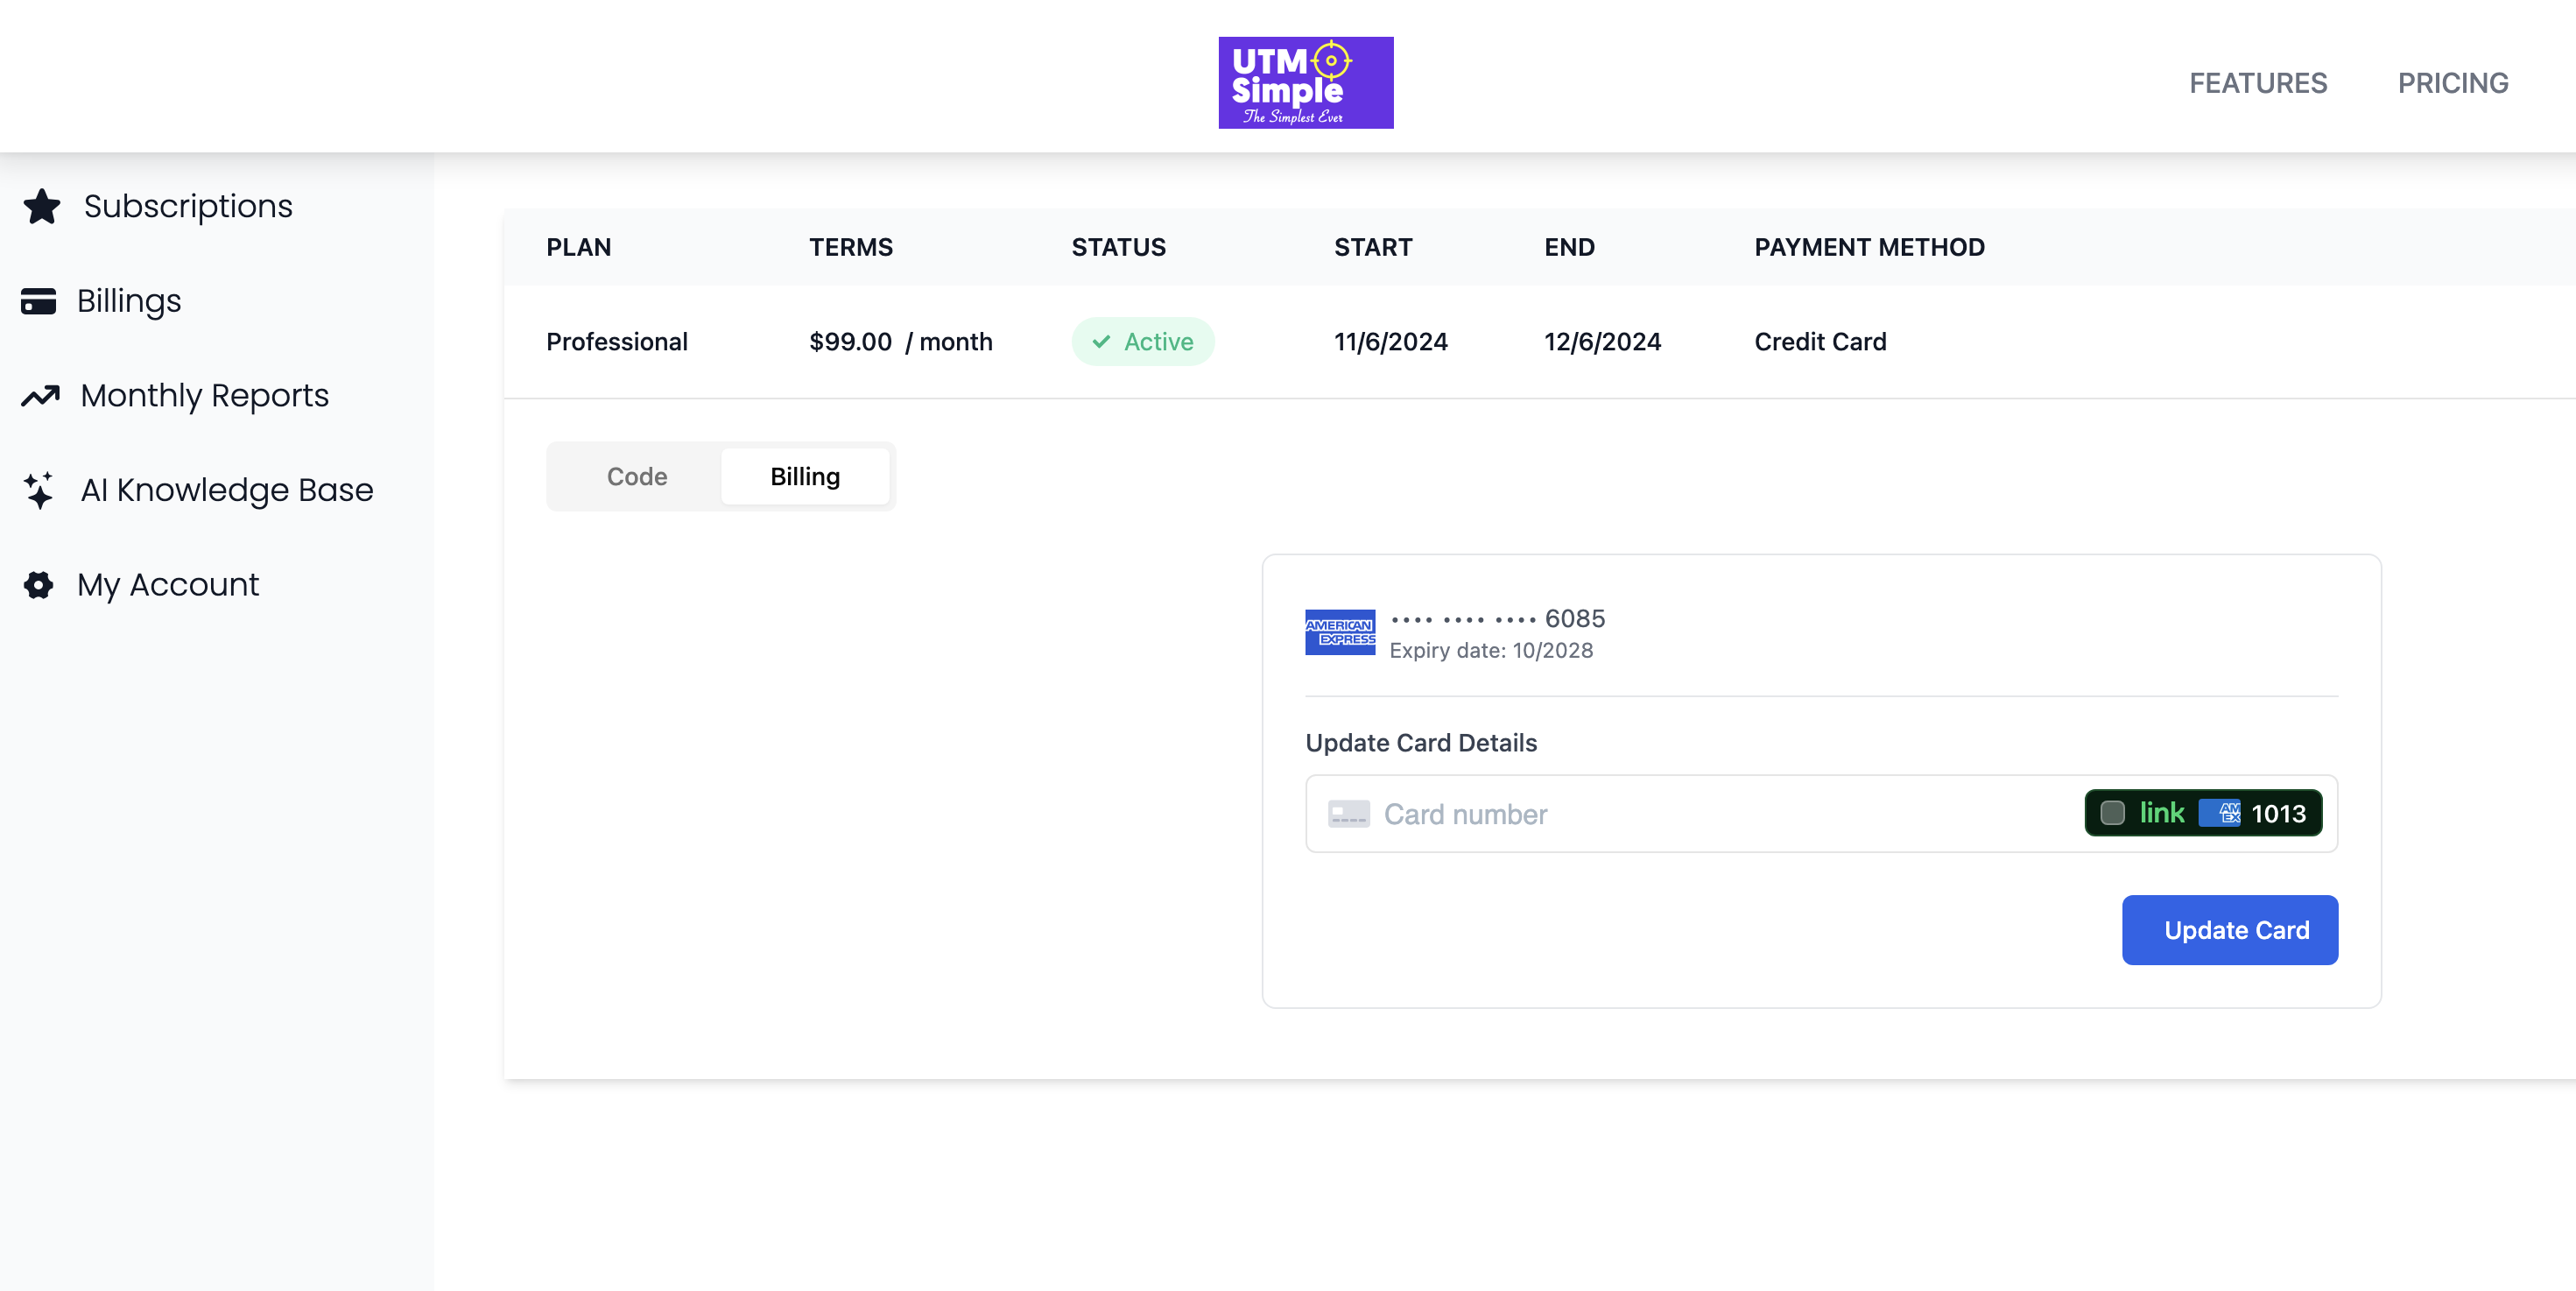
6. Enter New Card Information
- Enter your new card number in the provided field.
- Ensure that all details are correct.
7. Save Your Changes
- Click the "Update Card" button to save your new billing information.
8. Confirmation
- You should receive a confirmation that your billing information has been updated successfully.
For any issues or further assistance, please contact our customer support team.
UTMsimple Subscription Cancellation Guide
Follow the steps below to cancel your subscription to UTMsimple. The cancellation will take effect at the end of your billing period.
Step-by-Step Instructions
Log In to Your Account
Visit utmsimple.com and log in with your credentials. Access Your Account Settings
Click on your name at the top of the page to open the drop-down menu. Select My Account from the menu options. Open Subscription Management
Review your list of active subscriptions. Locate the subscription you wish to cancel. Cancel the Subscription
Click the Cancel button next to the specific membership you want to stop.
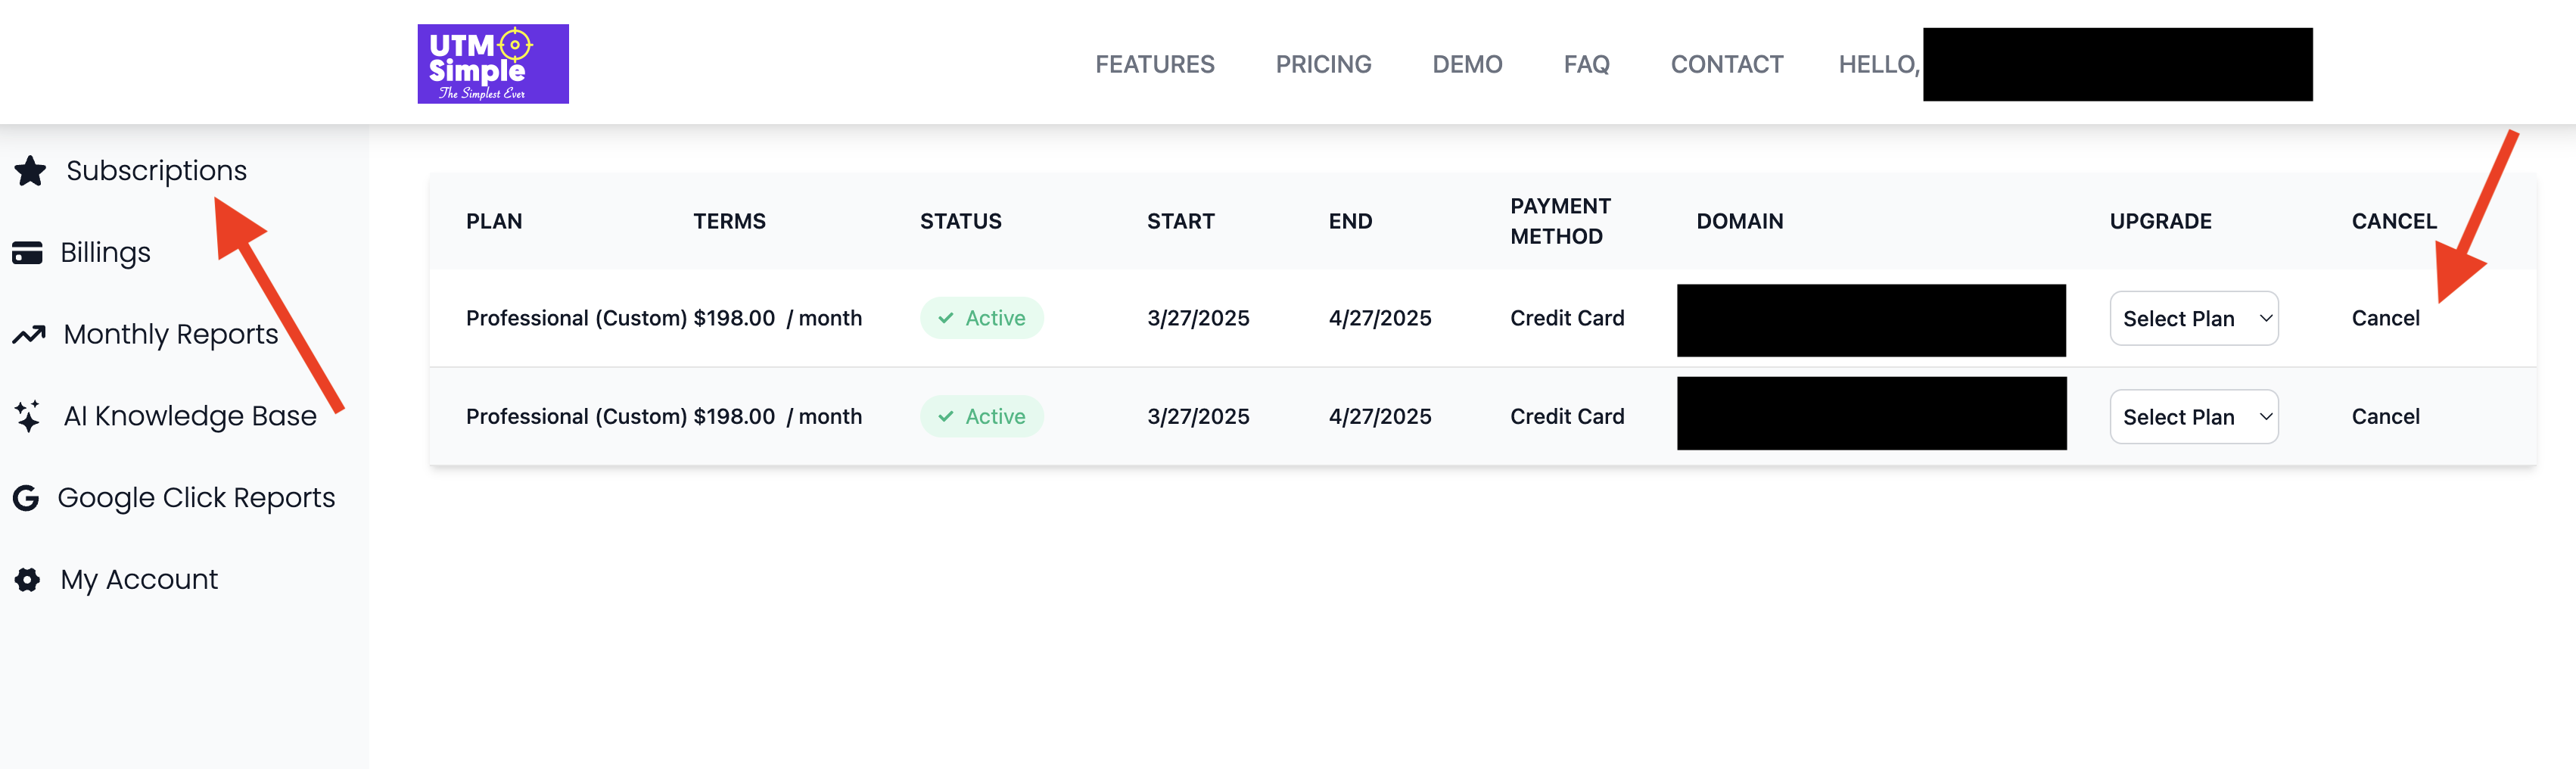
Confirm any prompts to finalize your cancellation.
Important Notes
Cancellation Timing: Your subscription will remain active until the end of the current billing cycle. Reactivation: You can reactivate your subscription anytime before the billing period ends by following the same steps and selecting a plan to continue. For further assistance, you can contact UTMsimple's customer support through their contact page.
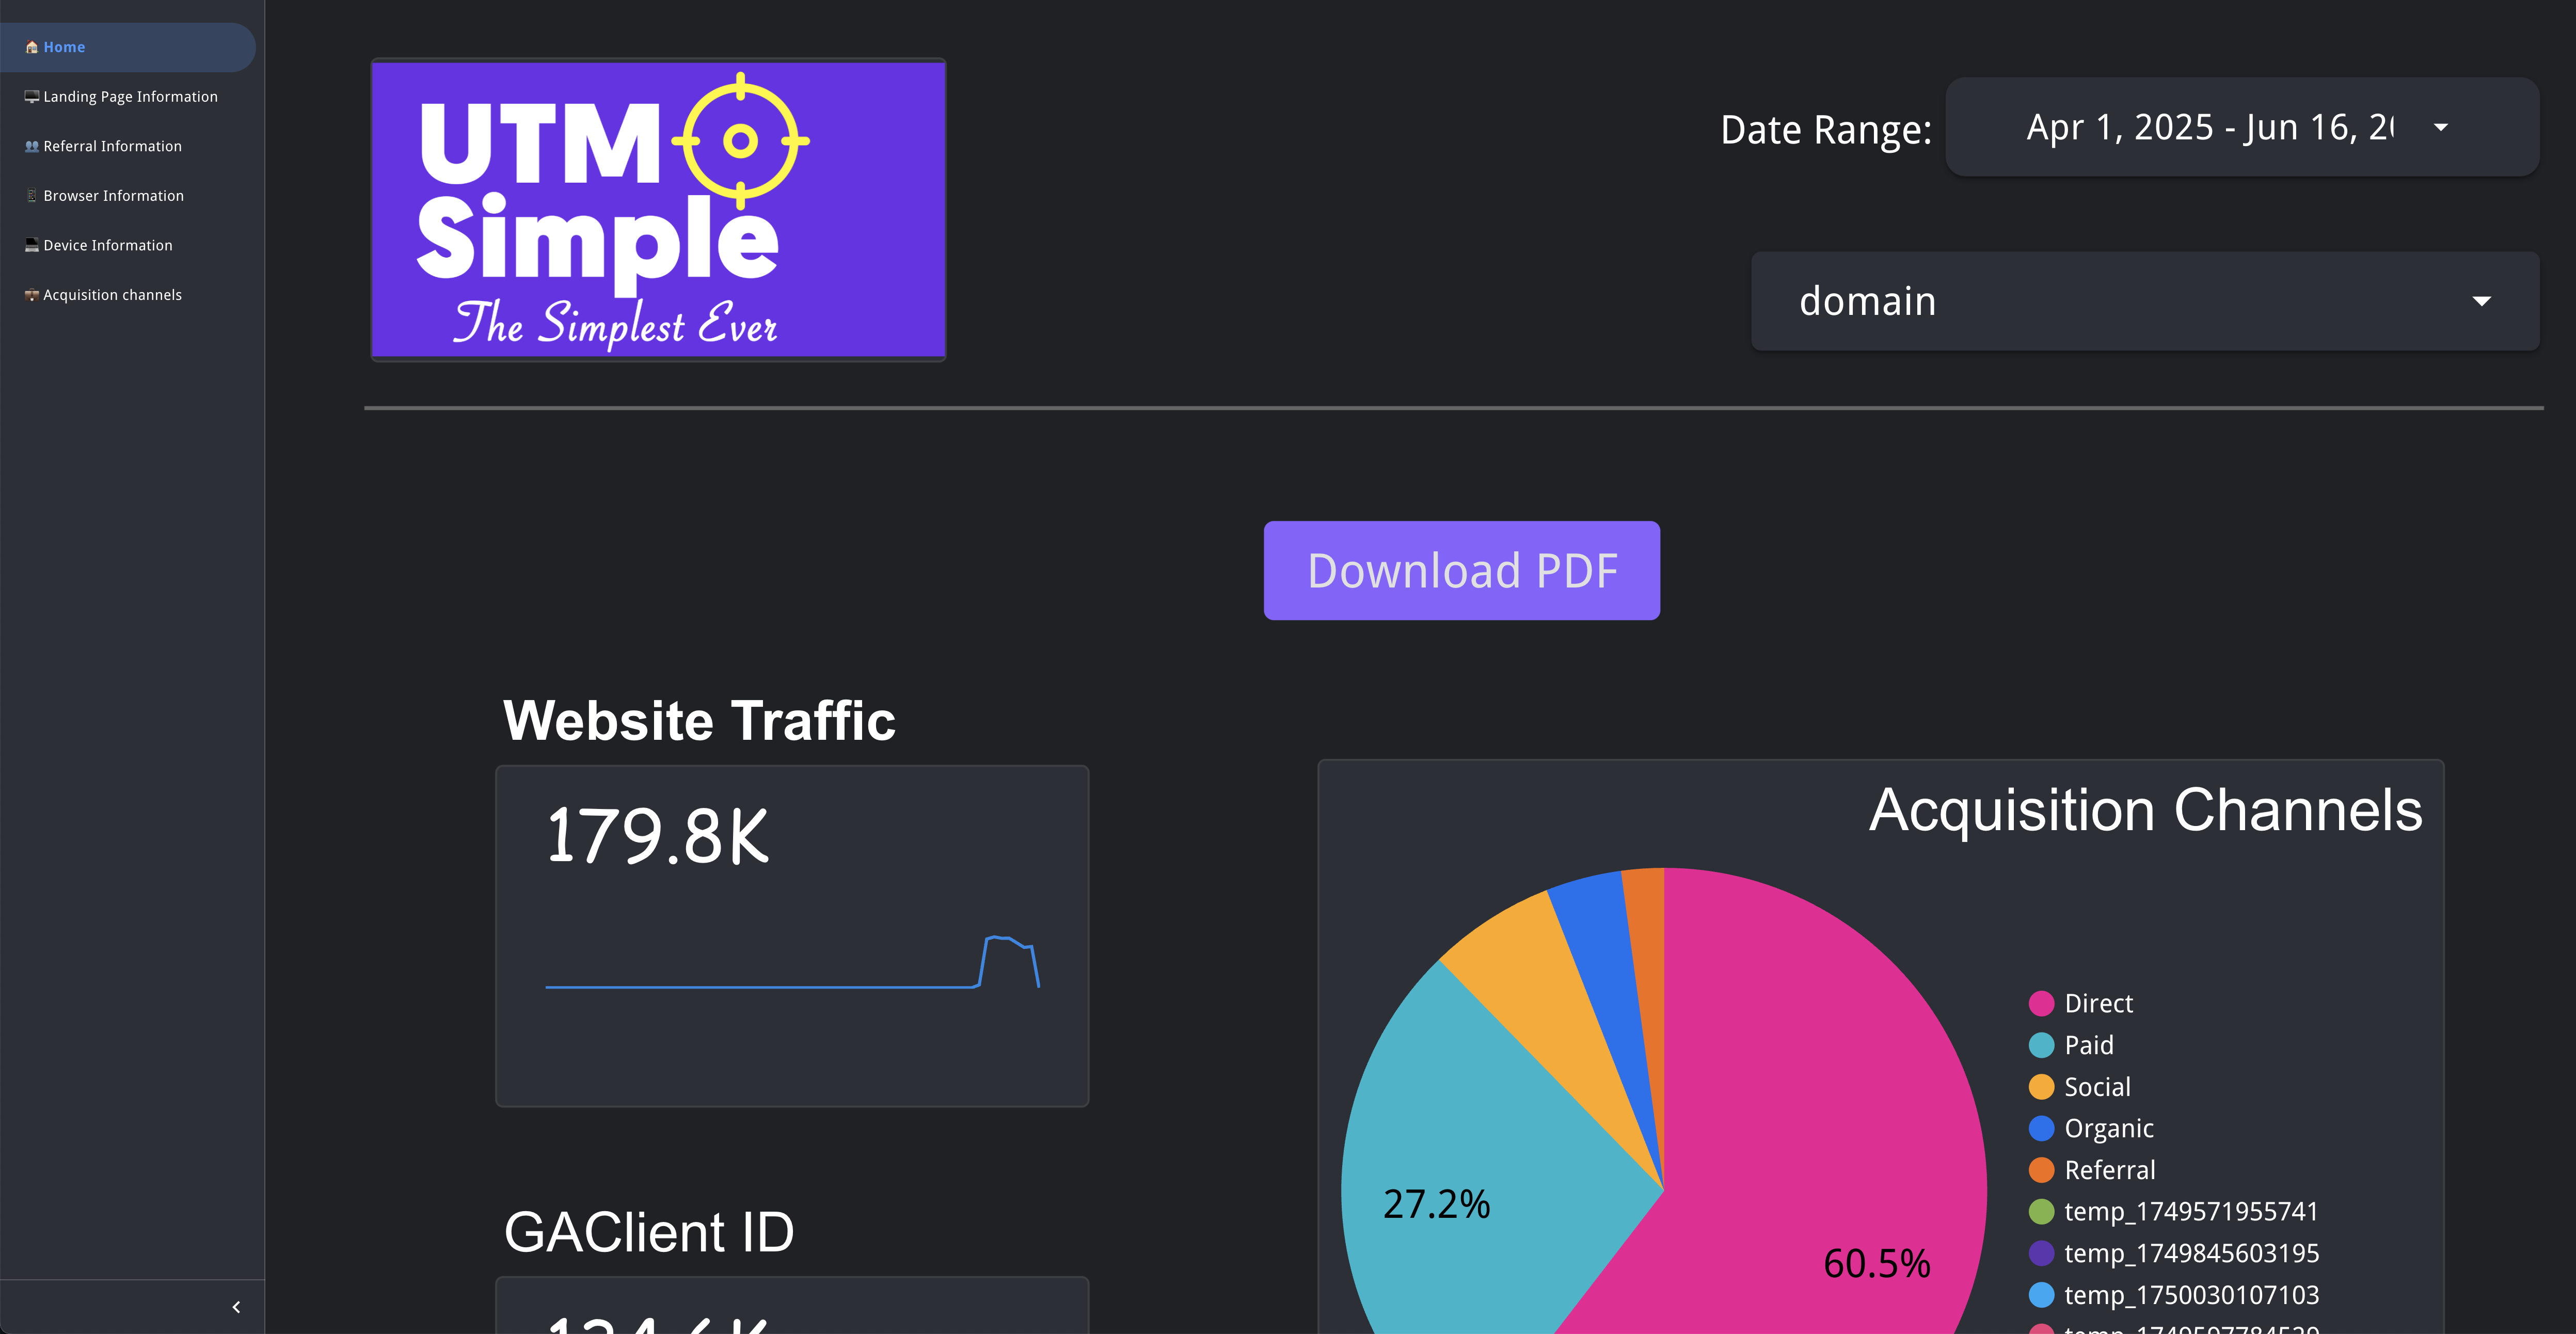
How to Create a Looker Studio Report in UTMSimple
This guide will walk you through generating and accessing your Looker Studio Analytics Report for any of your subscriptions in UTMSimple.
Step 1: Log in and Go to My Account
- Log in to your UTMSimple account.
- Navigate to the top right corner and click on My Account.
- In the left-side menu, click Subscriptions.
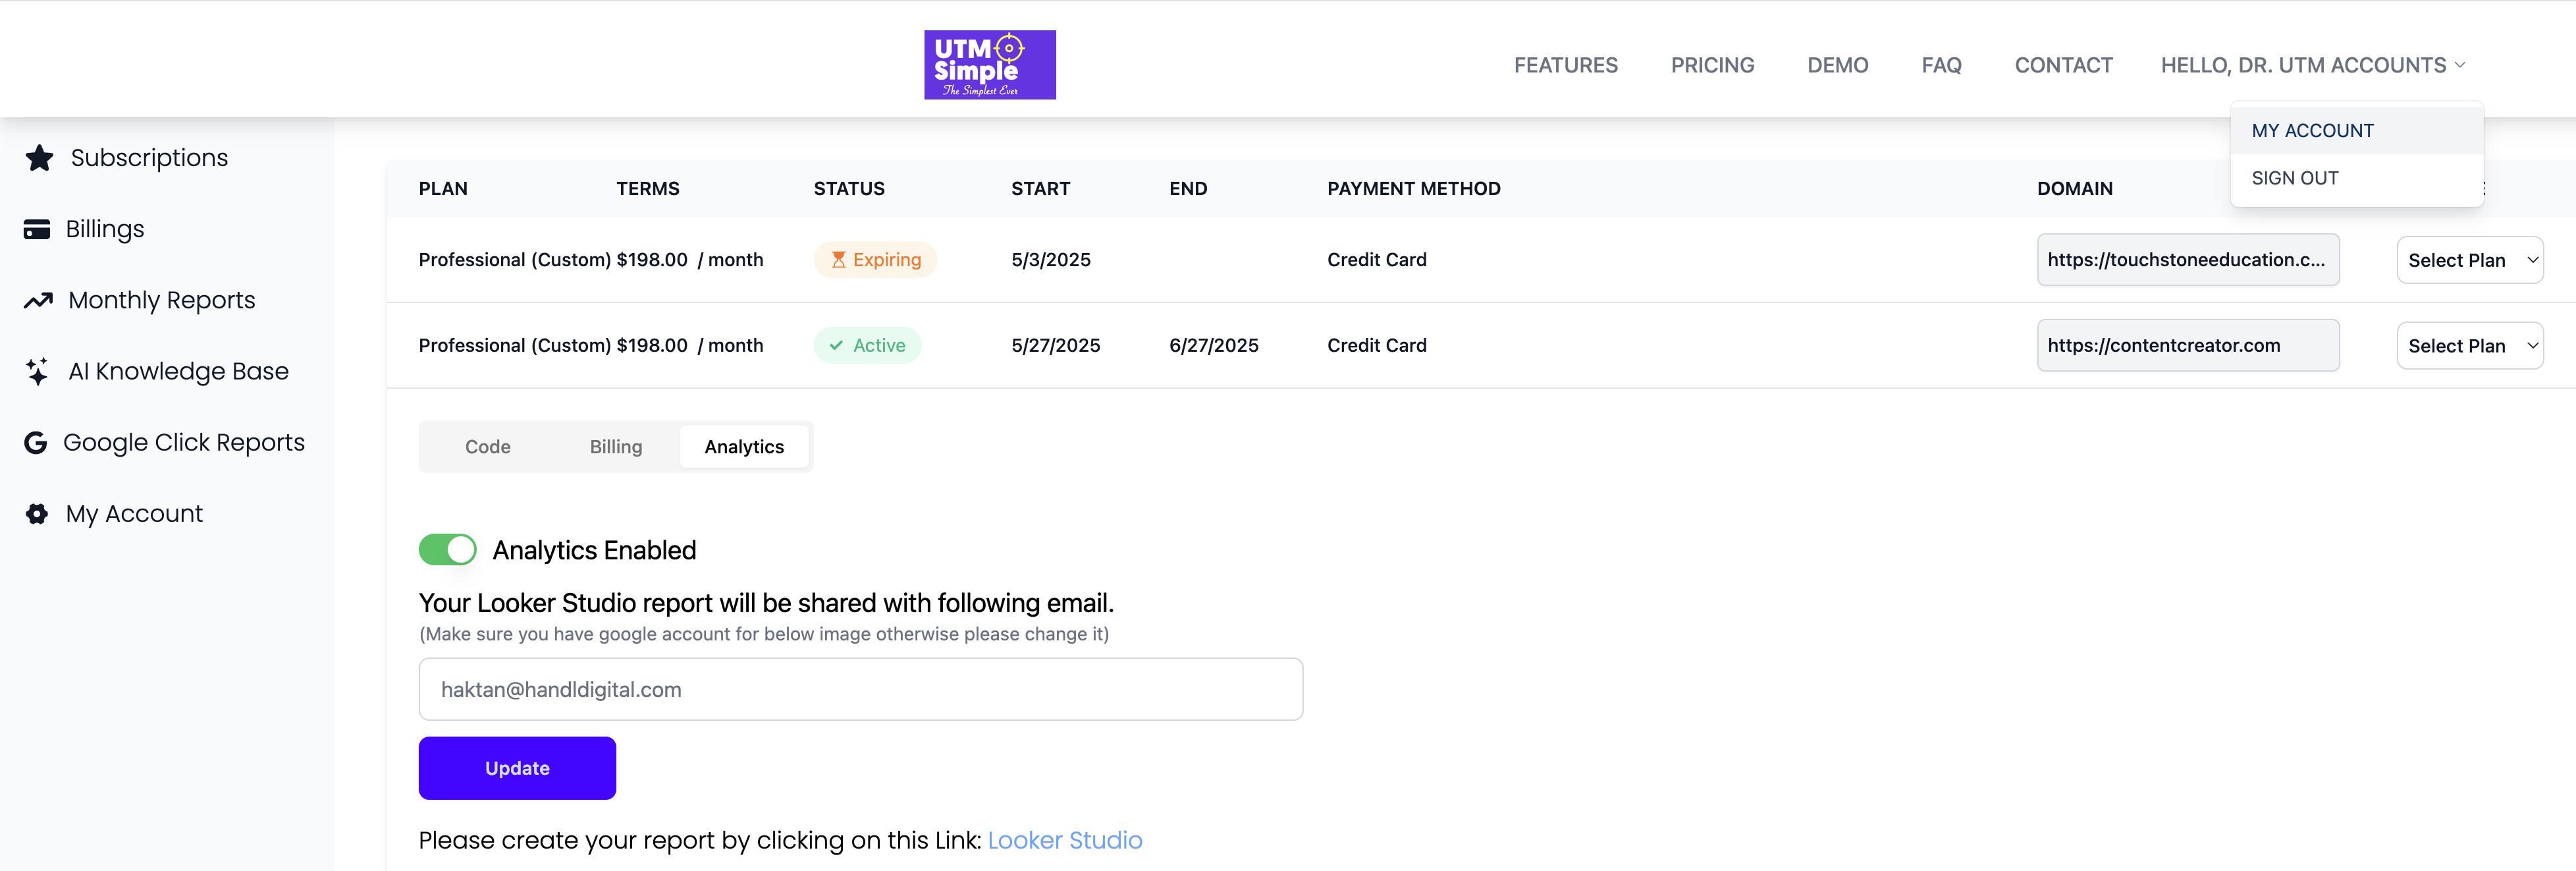
Step 2: Choose Your Subscription
- In Subscriptions, you’ll see a list of your active and expired plans.
- Find the subscription you want to use and click the Analytics tab for that subscription.
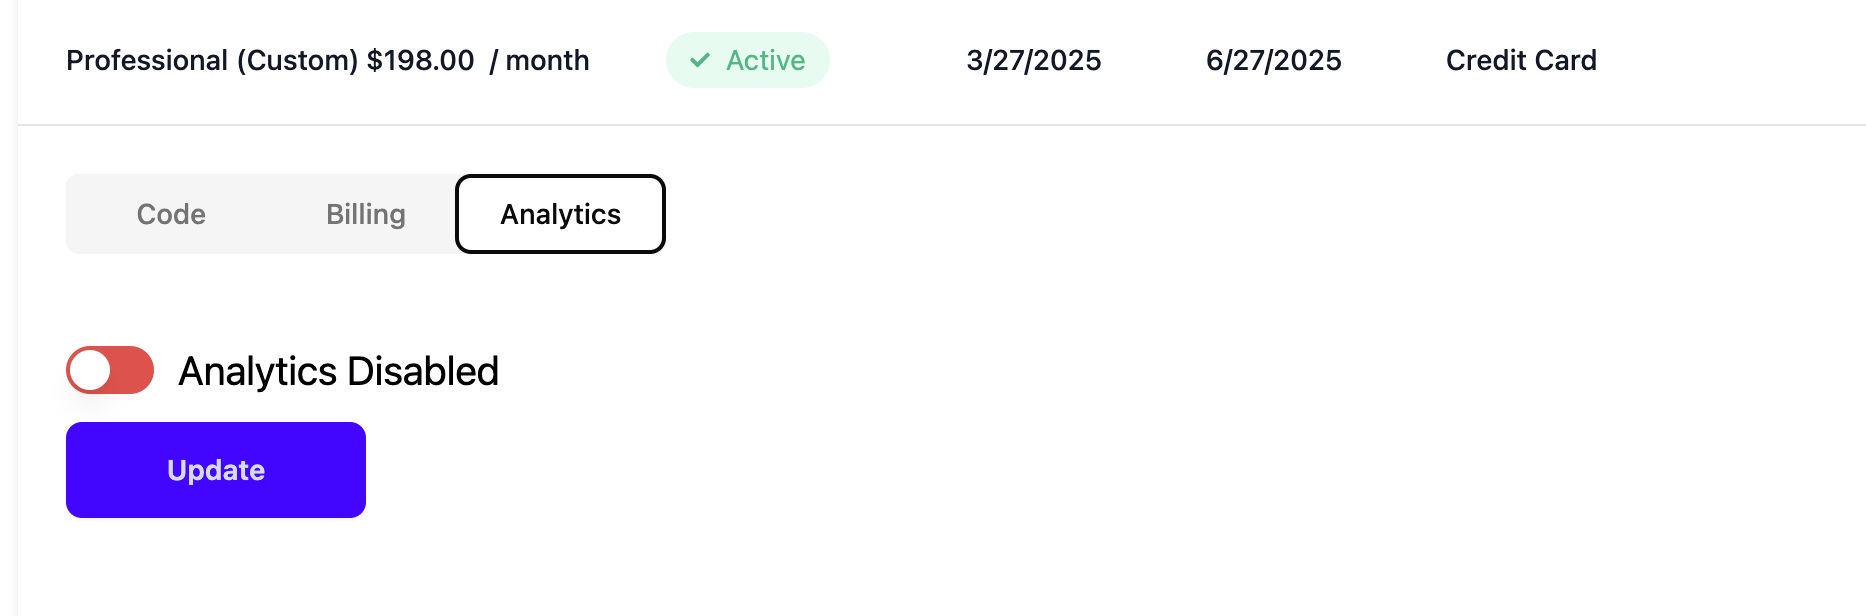
Step 3: Enable Analytics
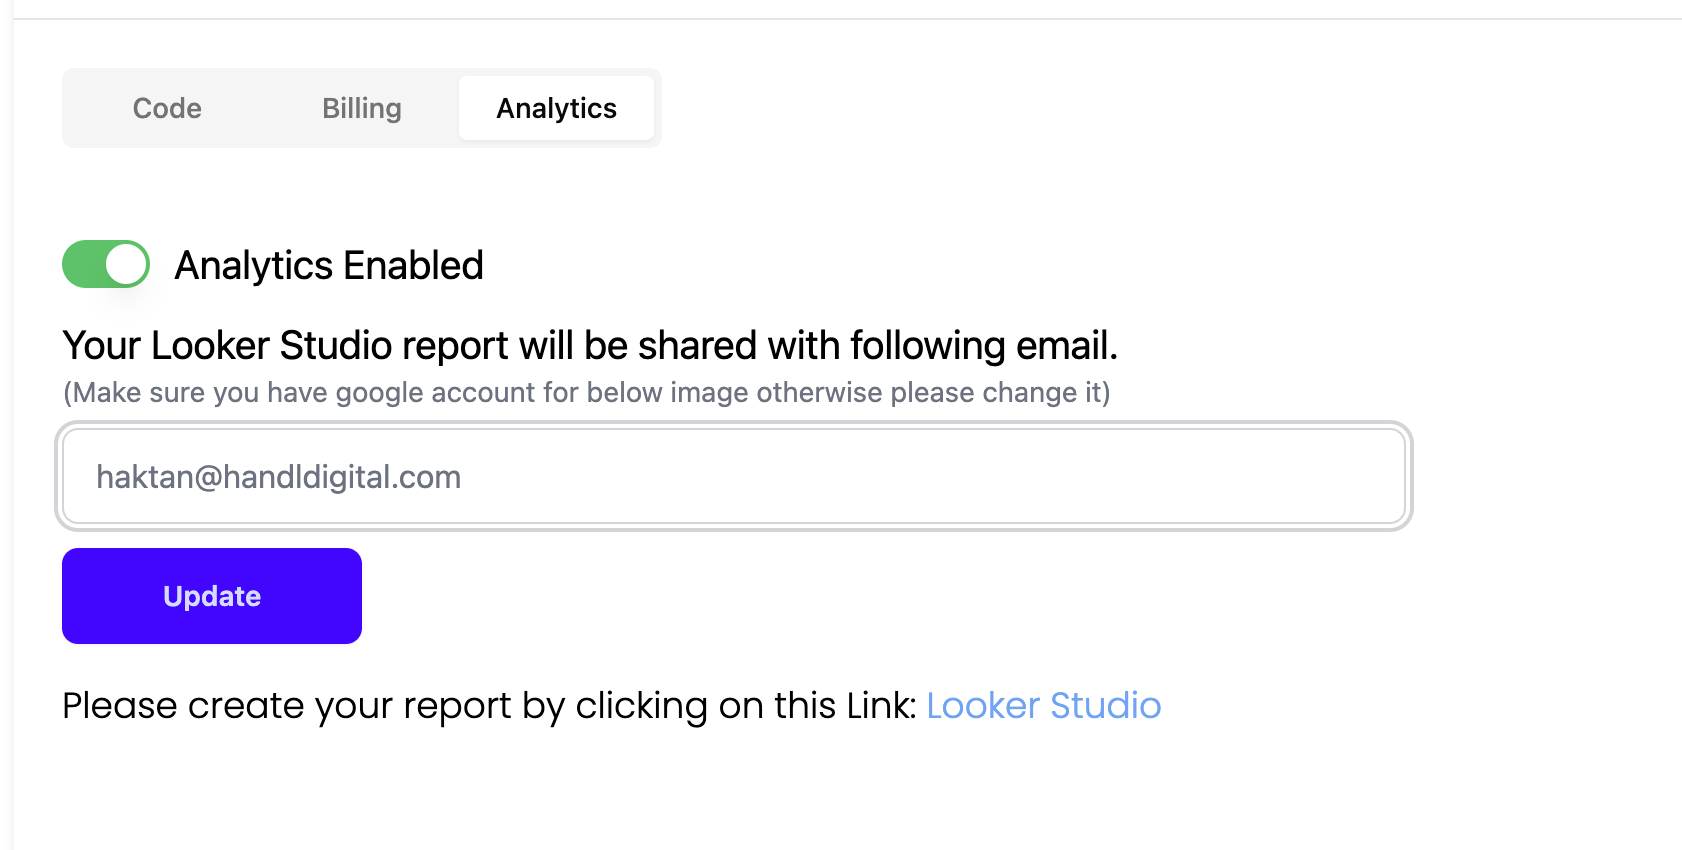
- If Analytics is disabled, toggle the switch to enable it.
- Enter your preferred email address (must be a Google account) to receive the Looker Studio report.
- Click Update.
Note: Make sure the email you provide is connected to a Google account.
Step 4: Access the Looker Studio Report Link
- Once analytics are enabled and you’ve updated your email, a link labeled Looker Studio will appear.
- Click on this link.
Step 5: View Your Report in Looker Studio
- You will be taken directly to your custom Looker Studio report.
- Explore your traffic, channels, and acquisition analytics.
- Use features like date range selection, filters, and PDF downloads as required.
Troubleshooting
- If you don’t see the link, double-check that Analytics is enabled and your email is correct.
- The Google email provided must have access to Google Looker Studio.
You’re all set! If you have any issues, contact support via the options in your UTMSimple dashboard.
Split Testing Guide
What is Split Testing?
Split testing (also known as A/B testing) allows you to show different content to different visitors on your website. This feature helps you test which version of your content performs better - whether it's different headlines, call-to-action buttons, pricing, or any other element.
How It Works
The split testing feature automatically divides your website visitors into two groups:
- Group A (handl_split1): Shows your control/original content
- Group B (handl_split2): Shows your test content
Important: The split ratio controls how many visitors see the control version (Group A). For example, if you set handl_split_ratio = 90, then 90% of visitors will see the control version and 10% will see the test version.
Once a visitor is assigned to a group, they'll consistently see the same version across all pages on your website.
Setup Instructions
1. Configure Split Ratio
Set the percentage of visitors who should see the control version (Group A). The default is 50% (50/50 split).
window.handl_split_ratio = 70; // 70% see control version, 30% see test version
Common split ratios:
-
50- Equal split (50% each) -
70- 70% control, 30% test -
80- 80% control, 20% test -
90- 90% control, 10% test
2. Add CSS Classes to Your Content
Wrap the content you want to test with the appropriate CSS classes:
<!-- Control version (Group A) -->
<div class="handl_split1">
    <h1>Original Headline</h1>
    <p>Original description text</p>
    <button class="btn-primary">Original CTA</button>
</div>

<!-- Test version (Group B) -->
<div class="handl_split2">
    <h1>New Headline</h1>
    <p>New description text</p>
    <button class="btn-secondary">New CTA</button>
</div>
Real-World Examples
Example 1: Headline Testing
Goal: Test which headline converts more visitors to sign up
<!-- Control headline -->
<div class="handl_split1">
    <h1>Get Your Free Trial Today</h1>
    <p>Start using our platform with a 30-day free trial</p>
</div>

<!-- Test headline -->
<div class="handl_split2">
    <h1>Join 10,000+ Happy Customers</h1>
    <p>Start using our platform with a 30-day free trial</p>
</div>
Example 2: Call-to-Action Button Testing
Goal: Test different button colors and text
<!-- Control CTA -->
<div class="handl_split1">
    <button class="btn-blue">Start Free Trial</button>
</div>

<!-- Test CTA -->
<div class="handl_split2">
    <button class="btn-green">Get Started Now</button>
</div>
Example 3: Pricing Display Testing
Goal: Test different pricing presentations
<!-- Control pricing -->
<div class="handl_split1">
    <div class="pricing-card">
        <h2>Pro Plan</h2>
        <div class="price">$29/month</div>
        <ul>
            <li>Feature 1</li>
            <li>Feature 2</li>
        </ul>
    </div>
</div>

<!-- Test pricing -->
<div class="handl_split2">
    <div class="pricing-card">
        <h2>Pro Plan</h2>
        <div class="price">$29/month</div>
        <div class="savings">Save $120/year</div>
        <ul>
            <li>Feature 1</li>
            <li>Feature 2</li>
        </ul>
    </div>
</div>
Example 4: Form Testing
Goal: Test different form layouts
<!-- Control form -->
<div class="handl_split1">
    <form>
        <input type="email" placeholder="Enter your email">
        <input type="text" placeholder="Your name">
        <button type="submit">Subscribe</button>
    </form>
</div>

<!-- Test form -->
<div class="handl_split2">
    <form>
        <input type="text" placeholder="Your name">
        <input type="email" placeholder="Enter your email">
        <button type="submit">Get Started</button>
    </form>
</div>
Example 5: Hero Section Testing
Goal: Test different hero section layouts
<!-- Control hero -->
<div class="handl_split1">
    <div class="hero">
        <h1>Transform Your Business</h1>
        <p>Our platform helps you grow faster</p>
        <button>Learn More</button>
    </div>
</div>

<!-- Test hero -->
<div class="handl_split2">
    <div class="hero">
        <h1>Grow Your Business 10x Faster</h1>
        <p>Join thousands of successful businesses</p>
        <button>Start Growing</button>
    </div>
</div>
Best Practices
1. Test One Element at a Time
Focus on testing one specific element (headline, button, image) rather than multiple changes at once. This helps you identify what's driving the difference in performance.
2. Run Tests Long Enough
Allow your tests to run for at least 1-2 weeks to get statistically significant results. Don't make decisions based on just a few days of data.
3. Set Clear Goals
Before starting a test, define what success looks like:
- More sign-ups?
- Higher click-through rates?
- Increased time on page?
- More purchases?
4. Monitor Performance
Track your key metrics during the test to ensure the test version isn't hurting your overall performance.
Advanced Usage
Testing Multiple Elements
You can test multiple elements on the same page:
<!-- Header testing -->
<div class="handl_split1">
    <header>Control Header</header>
</div>
<div class="handl_split2">
    <header>New Header</header>
</div>

<!-- Footer testing -->
<div class="handl_split1">
    <footer>Control Footer</footer>
</div>
<div class="handl_split2">
    <footer>New Footer</footer>
</div>
Testing Different Page Layouts
<!-- Control layout -->
<div class="handl_split1">
    <div class="sidebar-left">
        <nav>Navigation</nav>
    </div>
    <div class="main-content">
        <h1>Content</h1>
    </div>
</div>

<!-- Test layout -->
<div class="handl_split2">
    <div class="main-content">
        <h1>Content</h1>
    </div>
    <div class="sidebar-right">
        <nav>Navigation</nav>
    </div>
</div>
Troubleshooting
Visitors See Both Versions
- Make sure you have the correct CSS classes (
handl_split1andhandl_split2) - Check that the split testing is properly initialized
Split Ratio Not Working
- Verify that
handl_split_ratiois set correctly - Clear browser cookies to reset the test assignment
Content Not Showing
- Check that your CSS classes are properly applied
- Ensure the split testing script is loaded before your content
Analytics Integration
The split testing feature automatically triggers events that you can track in your analytics:
-
UTMSimpleSplitTestInitialized- Fired when split testing is set up - The assigned split group is stored in cookies for tracking
You can use these events to track conversion rates for each version in your analytics platform.
UTMSimpleSplitTestInitialized Event
This event is triggered when split testing is initialized and includes detailed information about the split assignment.
Event Details
Event Name: UTMSimpleSplitTestInitialized
Event Data:
{
    splitDecision: "handl_split1" | "handl_split2",  // The assigned split group
    splitRatio: 50  // The configured split ratio percentage
}
Listening for the Event
document.addEventListener('UTMSimpleSplitTestInitialized', function(event) {
    console.log('Split Decision:', event.detail.splitDecision);
    console.log('Split Ratio:', event.detail.splitRatio);

    // Track in Google Analytics
    if (typeof gtag !== 'undefined') {
        gtag('event', 'split_test_assigned', {
            'split_group': event.detail.splitDecision,
            'split_ratio': event.detail.splitRatio
        });
    }

    // Track in Facebook Pixel
    if (typeof fbq !== 'undefined') {
        fbq('track', 'CustomEvent', {
            event_name: 'split_test_assigned',
            split_group: event.detail.splitDecision,
            split_ratio: event.detail.splitRatio
        });
    }
});
Use Cases
-
Analytics Tracking
document.addEventListener('UTMSimpleSplitTestInitialized', function(event) { // Send to your analytics platform analytics.track('Split Test Assigned', { splitGroup: event.detail.splitDecision, splitRatio: event.detail.splitRatio, timestamp: new Date().toISOString() }); }); -
Conversion Tracking
document.addEventListener('UTMSimpleSplitTestInitialized', function(event) { // Store split group for later conversion tracking sessionStorage.setItem('splitGroup', event.detail.splitDecision); }); // Later, when tracking conversions function trackConversion() { const splitGroup = sessionStorage.getItem('splitGroup'); if (splitGroup) { analytics.track('Purchase', { splitGroup: splitGroup, value: 99.99 }); } } -
Debugging Split Tests
document.addEventListener('UTMSimpleSplitTestInitialized', function(event) { console.log('🔬 Split Test Debug Info:'); console.log(' - Assigned Group:', event.detail.splitDecision); console.log(' - Split Ratio:', event.detail.splitRatio + '%'); console.log(' - Test Version:', event.detail.splitDecision === 'handl_split2' ? 'B' : 'A'); }); -
Conditional Logic Based on Split
document.addEventListener('UTMSimpleSplitTestInitialized', function(event) {
    if (event.detail.splitDecision === 'handl_split2') {
        // Apply special styling or functionality for test group
        document.body.classList.add('test-version');
    }
});
Event Timing
The event is fired:
- When the page loads and split testing is initialized
- After the split decision is made and stored in cookies
- Before the content is displayed to the visitor
Best Practices
- Listen Early: Add your event listener as early as possible in your page load
-
Handle Missing Data: Always check if
event.detailexists before accessing properties - Track Consistently: Use the same event data structure across all your analytics platforms
- Debug Mode: Add console logging during development to verify split assignments
// Complete example with error handling
document.addEventListener('UTMSimpleSplitTestInitialized', function(event) {
    if (!event.detail) {
        console.warn('Split test event missing detail data');
        return;
    }

    const { splitDecision, splitRatio } = event.detail;

    // Track in multiple analytics platforms
    if (typeof gtag !== 'undefined') {
        gtag('event', 'split_test_assigned', {
            split_group: splitDecision,
            split_ratio: splitRatio
        });
    }

    if (typeof fbq !== 'undefined') {
        fbq('track', 'CustomEvent', {
            event_name: 'split_test_assigned',
            split_group: splitDecision,
            split_ratio: splitRatio
        });
    }

    // Store for later use
    sessionStorage.setItem('splitTestData', JSON.stringify({
        splitDecision,
        splitRatio,
        assignedAt: new Date().toISOString()
    }));
});
Conclusion
Split testing is a powerful way to optimize your website's performance. Start with simple tests like headlines and buttons, then gradually test more complex elements as you become comfortable with the process.
Remember: The goal is to improve your website's performance, so always test with a clear hypothesis and measure the results!
UTMSimple Consent Mode Guide (GDPR)
UTMSimple now supports conditional consent mode that integrates seamlessly with Google Tag Manager (GTM) and other consent management systems.
How It Works
When UTMSIMPLE_CONSENT_MODE = true is set globally, UTMSimple will not automatically initialize. Instead, you can manually call HandL.init() when consent is granted.
Basic Implementation
1. Enable Consent Mode
Set the global flag before loading UTMSimple:
<script>
    window.UTMSIMPLE_CONSENT_MODE = true;
</script>
<script src="path/to/utmsimple.js"></script>
2. Initialize When Consent is Granted
// When user grants consent
window.UTMSIMPLE_CONSENT_MODE = false;
HandL.init();
GTM Integration
Method 1: Using GTM Variables and Triggers
-
Create a GTM Variable for consent status:
- Variable Type: Custom JavaScript
- Code:
return window.UTMSIMPLE_CONSENT_MODE || false;
-
Create a Trigger for consent granted:
- Trigger Type: Custom Event
- Event Name:
consent_granted - Or use GTM's built-in consent mode triggers
-
Create a Custom HTML Tag to initialize UTMSimple:
<script>
if (typeof HandL !== 'undefined') {
    window.UTMSIMPLE_CONSENT_MODE = false;
    HandL.init();
}
</script>
Method 2: Using GTM Consent Mode
-
Enable GTM Consent Mode in your container settings
-
Set consent mode variable:
<script> window.UTMSIMPLE_CONSENT_MODE = true; </script> -
Create a trigger based on consent mode changes:
- Trigger Type: Consent Initialization
- Consent Type: analytics_storage (or your preferred consent type)
-
Fire UTMSimple initialization when consent is granted
Advanced Usage
Cookie Management
UTMSimple provides a method to delete all cookies it has created:
// Delete all UTMSimple cookies and localStorage data
const result = HandL.deleteAllCookies();

// Result object contains:
// - deletedCount: number of cookies deleted
// - cookiesDeleted: array of cookie names that were deleted
This method:
- Deletes all UTM parameter cookies
- Deletes first-touch parameter cookies
- Deletes UTMSimple-specific cookies (handlID, handl_js_domain, etc.)
- Clears localStorage items used for Facebook advanced matching
- Fires a
UTMSimpleCookiesDeletedevent - Returns a result object with deletion details
Checking Consent Status
// Check if consent mode is enabled
if (typeof window.UTMSIMPLE_CONSENT_MODE !== "undefined" && window.UTMSIMPLE_CONSENT_MODE === true) {
    console.log('Consent mode is active');
}

// Check if HandL is available
if (typeof HandL !== 'undefined') {
    console.log('UTMSimple is loaded');
}
Event Listeners
UTMSimple fires custom events that you can listen to:
// Listen for successful initialization
document.addEventListener('UTMSimpleLoaded', function() {
    console.log('UTMSimple loaded successfully');
});

// Listen for cookie setting
document.addEventListener('UTMSimpleCookiesSet', function() {
    console.log('UTMSimple cookies have been set');
});

// Listen for cookie deletion
document.addEventListener('UTMSimpleCookiesDeleted', function(event) {
    console.log(`UTMSimple cookies deleted: ${event.detail.deletedCount} cookies removed`);
});
Dynamic Consent Management
// Grant consent
function grantConsent() {
    window.UTMSIMPLE_CONSENT_MODE = false;
    if (typeof HandL !== 'undefined') {
        HandL.init();
    }
}

// Revoke consent (for future page loads)
function revokeConsent() {
    window.UTMSIMPLE_CONSENT_MODE = true;
    // Delete all cookies when consent is revoked
    if (typeof HandL !== 'undefined') {
        HandL.deleteAllCookies();
    }
    // Note: This won't stop already running scripts, just prevents future initialization
}

// Delete all UTMSimple cookies and localStorage data
function deleteAllCookies() {
    if (typeof HandL !== 'undefined') {
        const result = HandL.deleteAllCookies();
        console.log(`Deleted ${result.deletedCount} cookies`);
        return result;
    }
}
Example Implementation
See consent_example.html for a complete working example that demonstrates:
- Enabling consent mode
- Granting/revoking consent
- Manual initialization
- Event listening
- Status checking
Best Practices
- Set consent mode before loading UTMSimple to prevent any initialization
- Use GTM's consent mode for comprehensive consent management
- Listen for UTMSimple events to confirm successful initialization
- Test consent flows thoroughly in development
- Consider user experience - don't block essential functionality
Troubleshooting
Script Not Initializing
- Check if
UTMSIMPLE_CONSENT_MODEis set totrue - Ensure
HandL.init()is called after consent is granted - Verify UTMSimple script is loaded before calling
HandL.init()
GTM Integration Issues
- Ensure GTM variables are properly configured
- Check trigger conditions match your consent logic
- Verify custom HTML tags are firing at the right time
Console Errors
- Look for "Consent mode enabled" messages in console
- Check for "HandL not available" warnings
- Ensure all dependencies are loaded