# Trigger an Event (Conversion) in Google Analytics (GA) based on Custom Event

#### Create 4 Data Layer variables

eventAction

eventValue

eventCategory

eventLabel


Here is one example, repeat this for all the variables above.

[![](https://docs.utmsimple.com/uploads/images/gallery/2022-01/scaled-1680-/image-1642042797571.png)
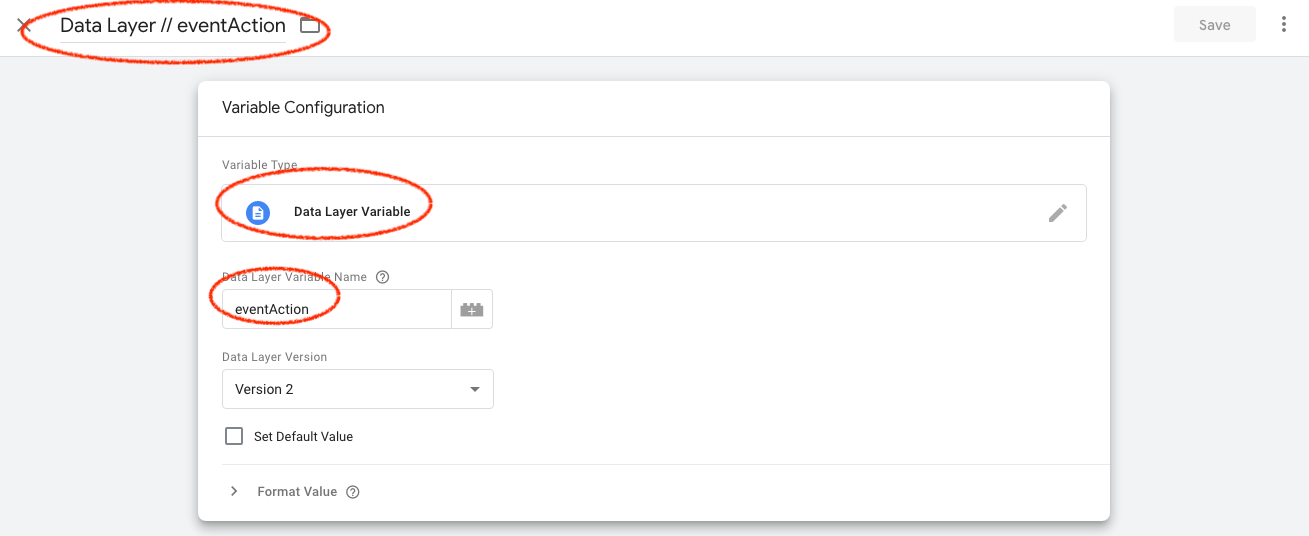
](https://docs.utmsimple.com/uploads/images/gallery/2022-01/image-1642042797571.png)

#### Configure your Event in GTM
Create your conversion event tag and use the above variables to autofill your event as shown in the image.

[![](https://docs.utmsimple.com/uploads/images/gallery/2022-01/scaled-1680-/image-1642042893463.png)
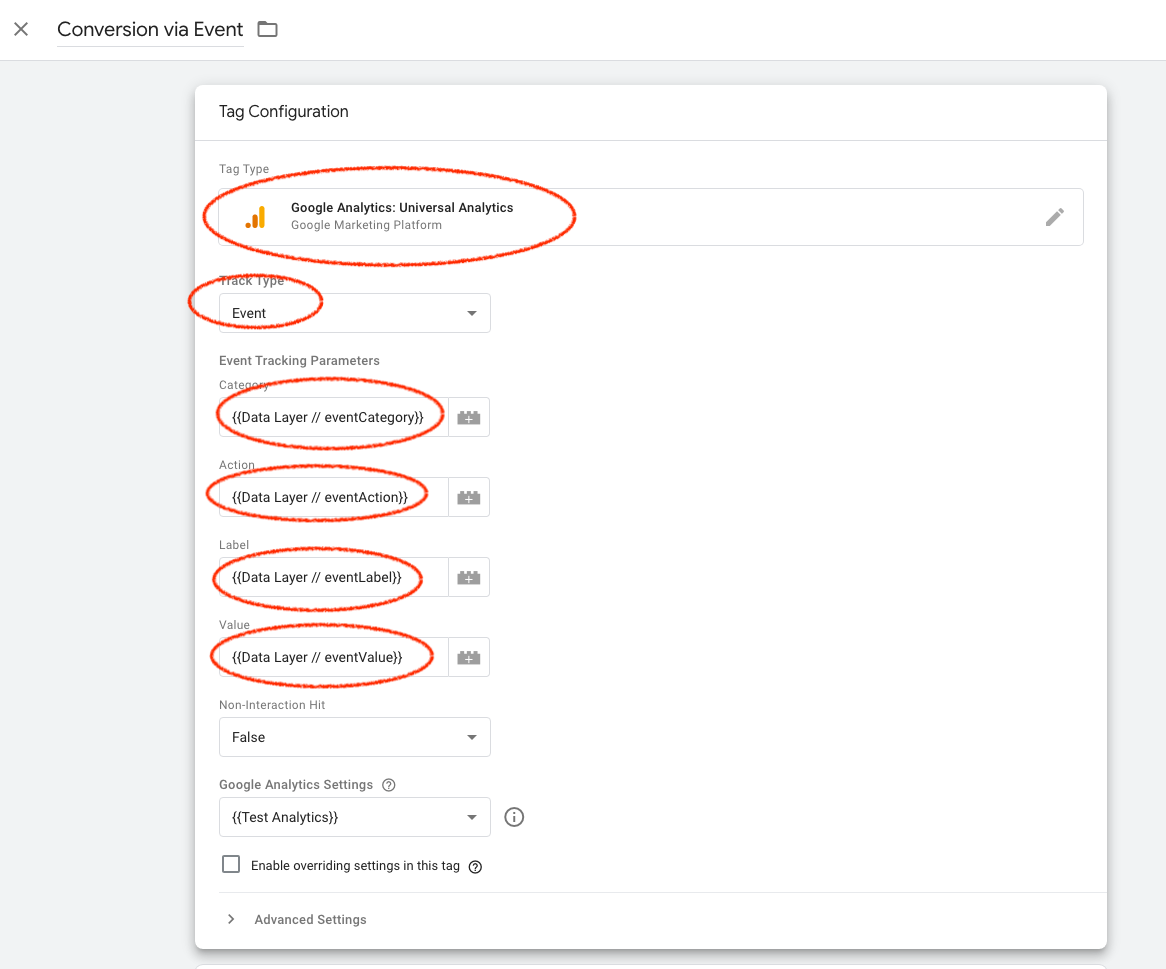
](https://docs.utmsimple.com/uploads/images/gallery/2022-01/image-1642042893463.png)


#### Set event based trigger

As shown below. We used "new_subscriber" as event name, you can use anything you want. 

[![](https://docs.utmsimple.com/uploads/images/gallery/2022-01/scaled-1680-/image-1642042951987.png)
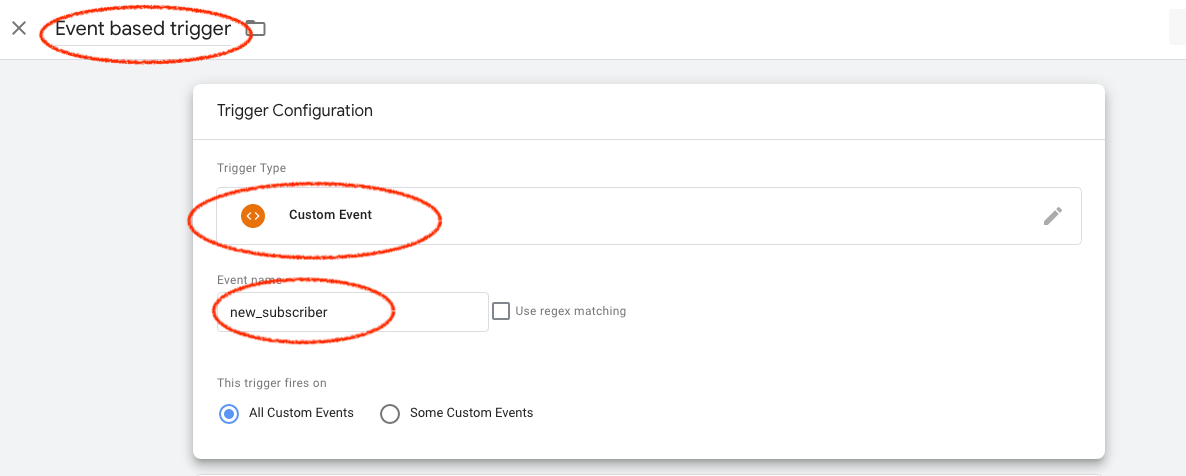
](https://docs.utmsimple.com/uploads/images/gallery/2022-01/image-1642042951987.png)


#### Add the trigger to your page (Method 1)

Add the following dataLayer code ABOVE your GTM script on your thank you page.
```
<script>
    window.dataLayer = window.dataLayer || [];
</script>
<script>
    // dataLayer.push({'amount': 11})
    window.dataLayer.push({
        'event': 'new_subscriber',
        'eventCategory': 'testcat2',
        'eventAction': 'myaction2',
        'eventLabel': 'mylabel2',
        'eventValue': 23,
    });

</script>
<script>(function(w,d,s,l,i){w[l]=w[l]||[];w[l].push({'gtm.start':
        new Date().getTime(),event:'gtm.js'});var f=d.getElementsByTagName(s)[0],
    j=d.createElement(s),dl=l!='dataLayer'?'&l='+l:'';j.async=true;j.src=
    'https://www.googletagmanager.com/gtm.js?id='+i+dl;f.parentNode.insertBefore(j,f);
})(window,document,'script','dataLayer','GTM-XXXXX');</script>
```

#### Add the trigger to your page (Method 2)
If you want to trigger this event with a button click.

You can use the following code.

```
<button onclick="window.dataLayer.push({
            'event': 'new_subscriber',
            'eventCategory': 'testcat2',
            'eventAction': 'myaction2',
            'eventLabel': 'mylabel2',
            'eventValue': 23,
        });">Signup</button>
```

After you implemented, trigger the event on your page and head to GA to see the data in action. 

[![](https://docs.utmsimple.com/uploads/images/gallery/2022-01/scaled-1680-/image-1642043226362.png)
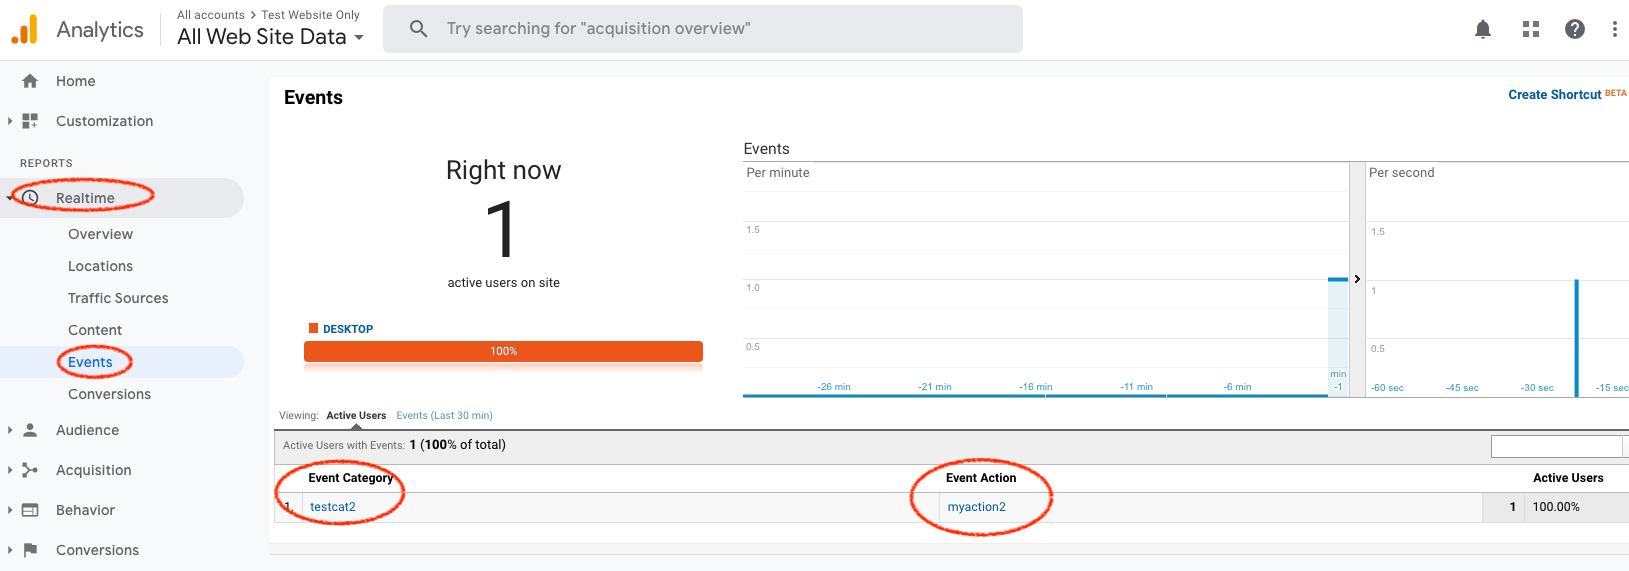
](https://docs.utmsimple.com/uploads/images/gallery/2022-01/image-1642043226362.png)

The UTM will be associated with your event as well

[![](https://docs.utmsimple.com/uploads/images/gallery/2022-01/scaled-1680-/image-1642043288189.png)
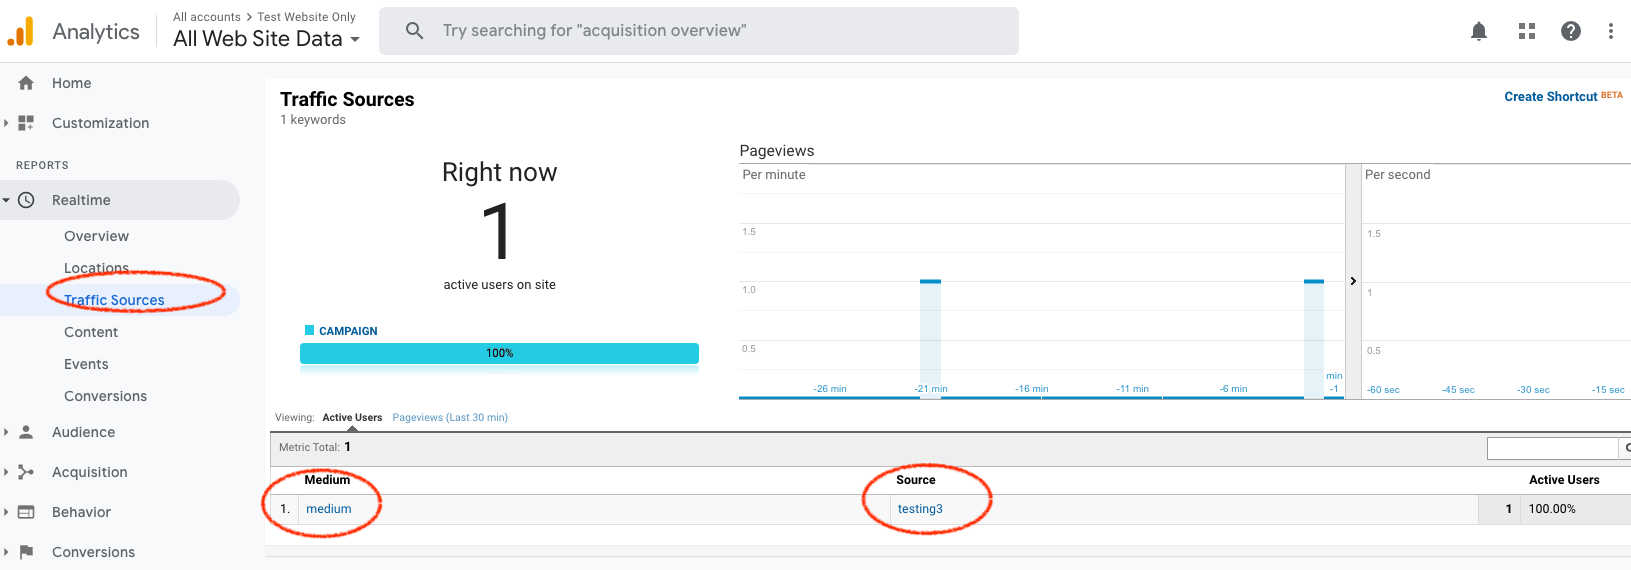
](https://docs.utmsimple.com/uploads/images/gallery/2022-01/image-1642043288189.png)

Or you can see it under Behavior > Events > Top Events (this may take longer to show up after your test)

[![](https://docs.utmsimple.com/uploads/images/gallery/2022-01/scaled-1680-/image-1642043397002.png)
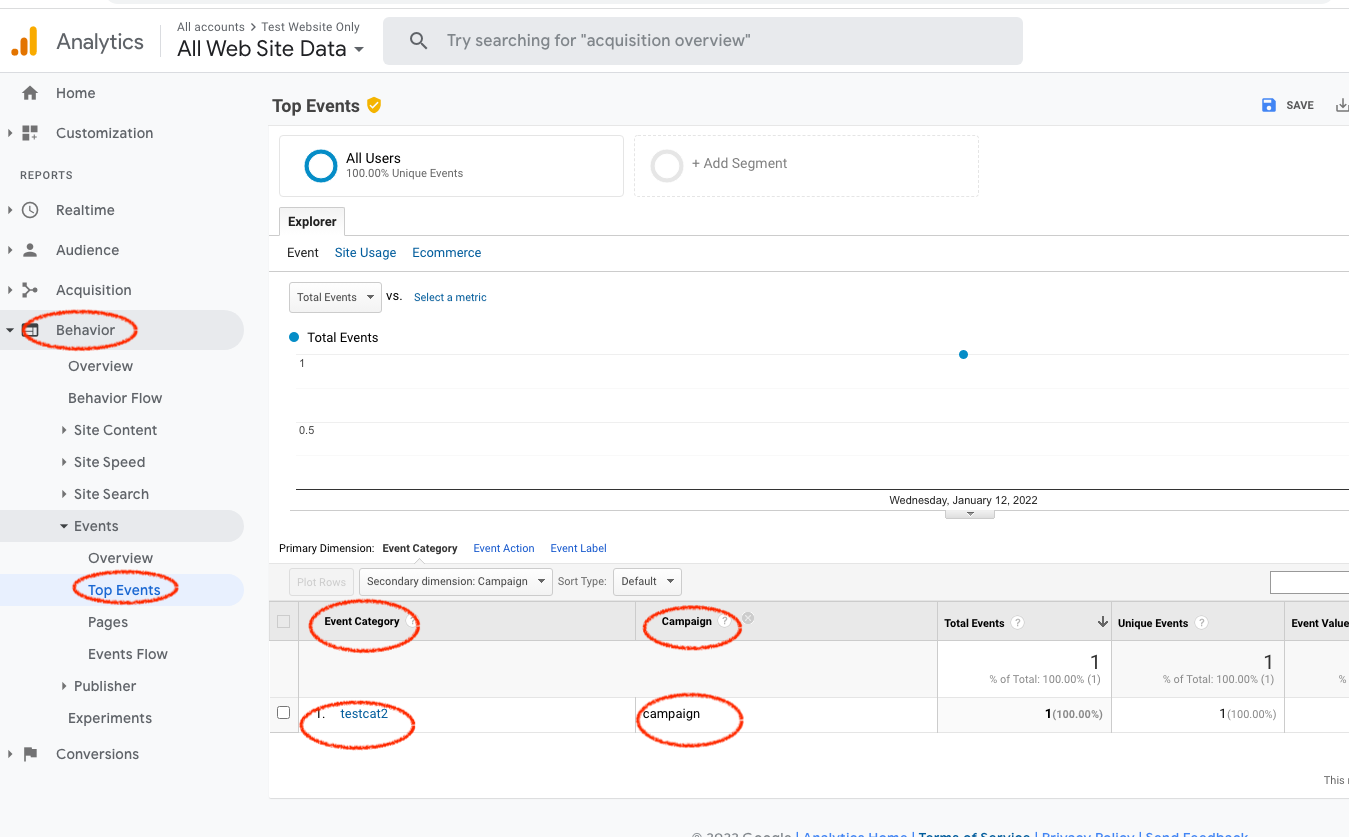
](https://docs.utmsimple.com/uploads/images/gallery/2022-01/image-1642043397002.png)