
How to Create a Looker Studio Report in UTMSimple
This guide will walk you through generating and accessing your Looker Studio Analytics Report for any of your subscriptions in UTMSimple.
Step 1: Log in and Go to My Account
- Log in to your UTMSimple account.
- Navigate to the top right corner and click on My Account.
- In the left-side menu, click Subscriptions.
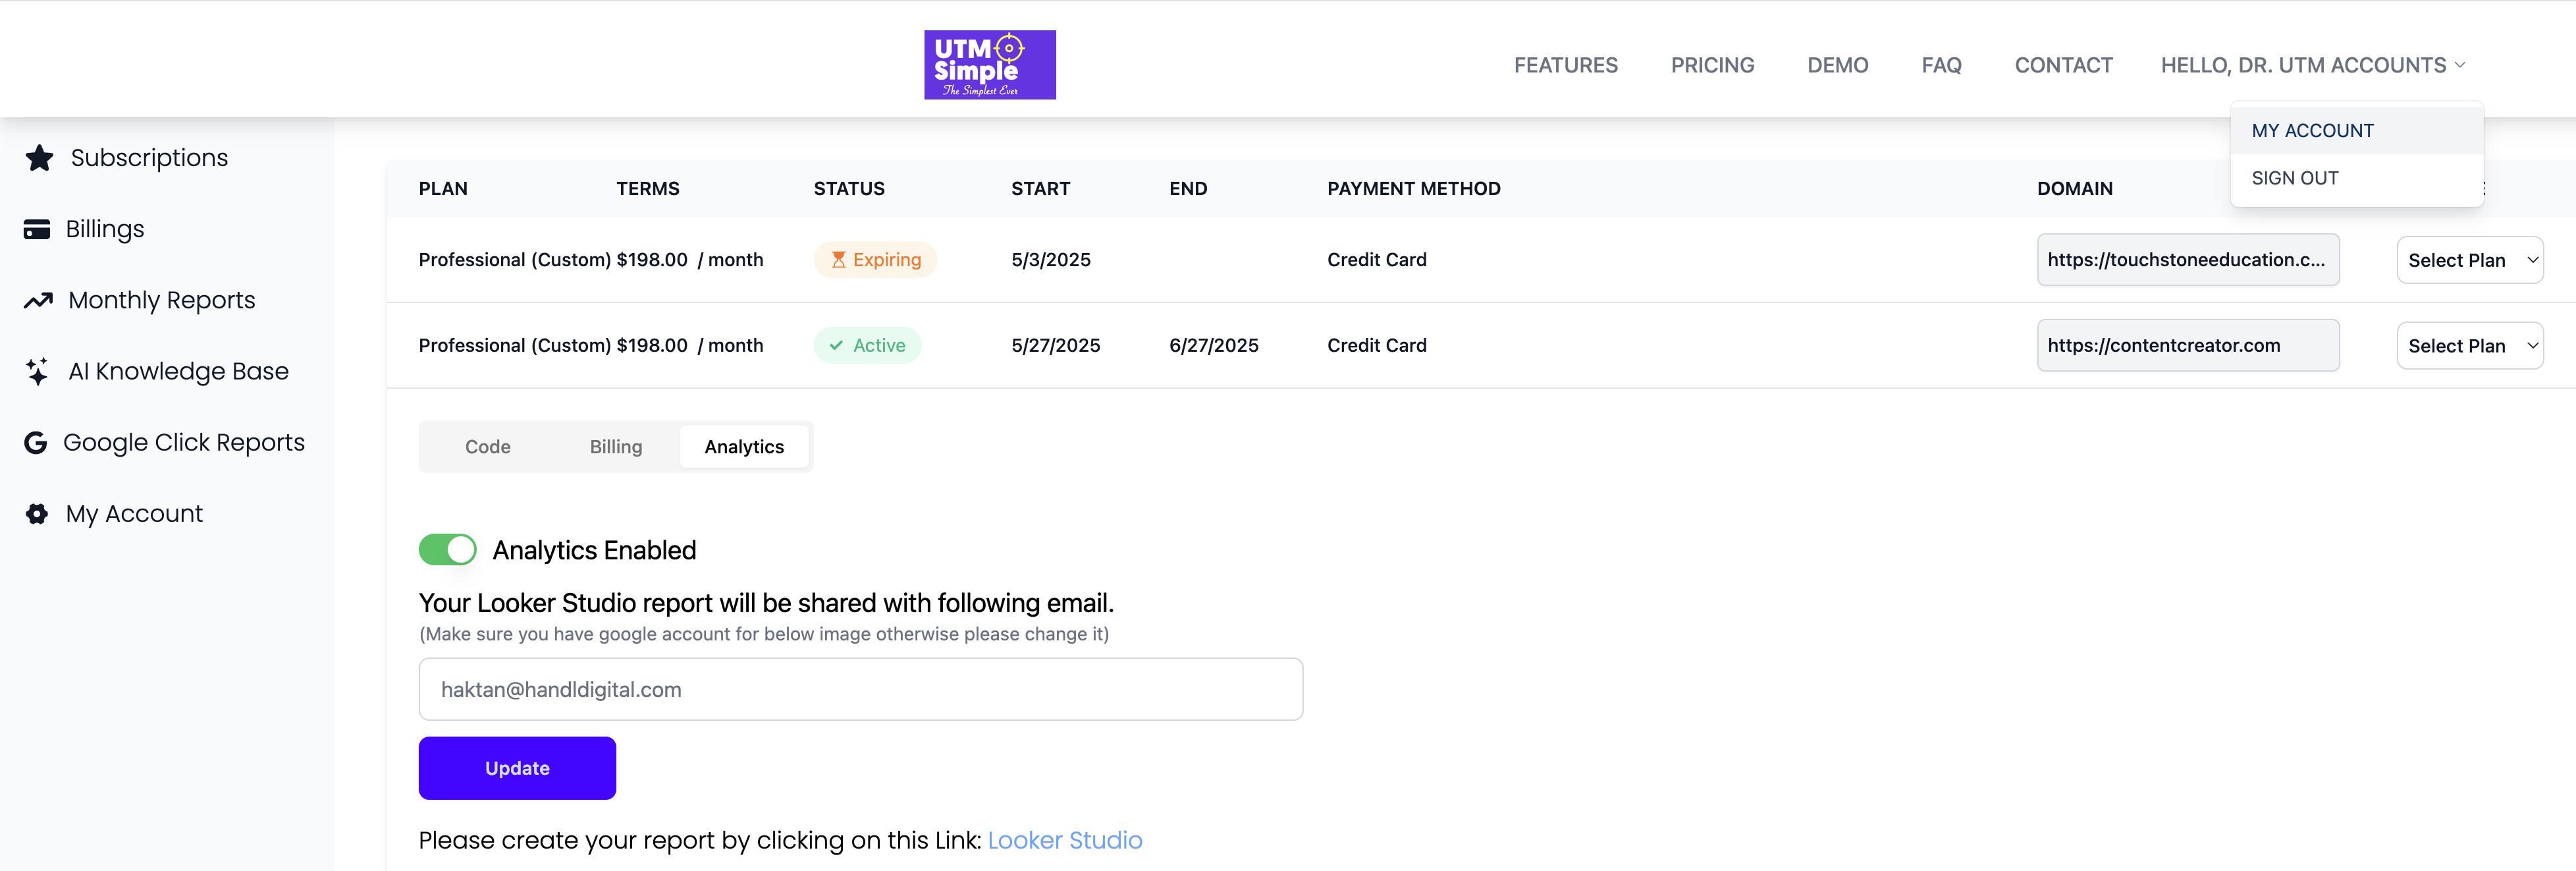
Step 2: Choose Your Subscription
- In Subscriptions, you’ll see a list of your active and expired plans.
- Find the subscription you want to use and click the Analytics tab for that subscription.
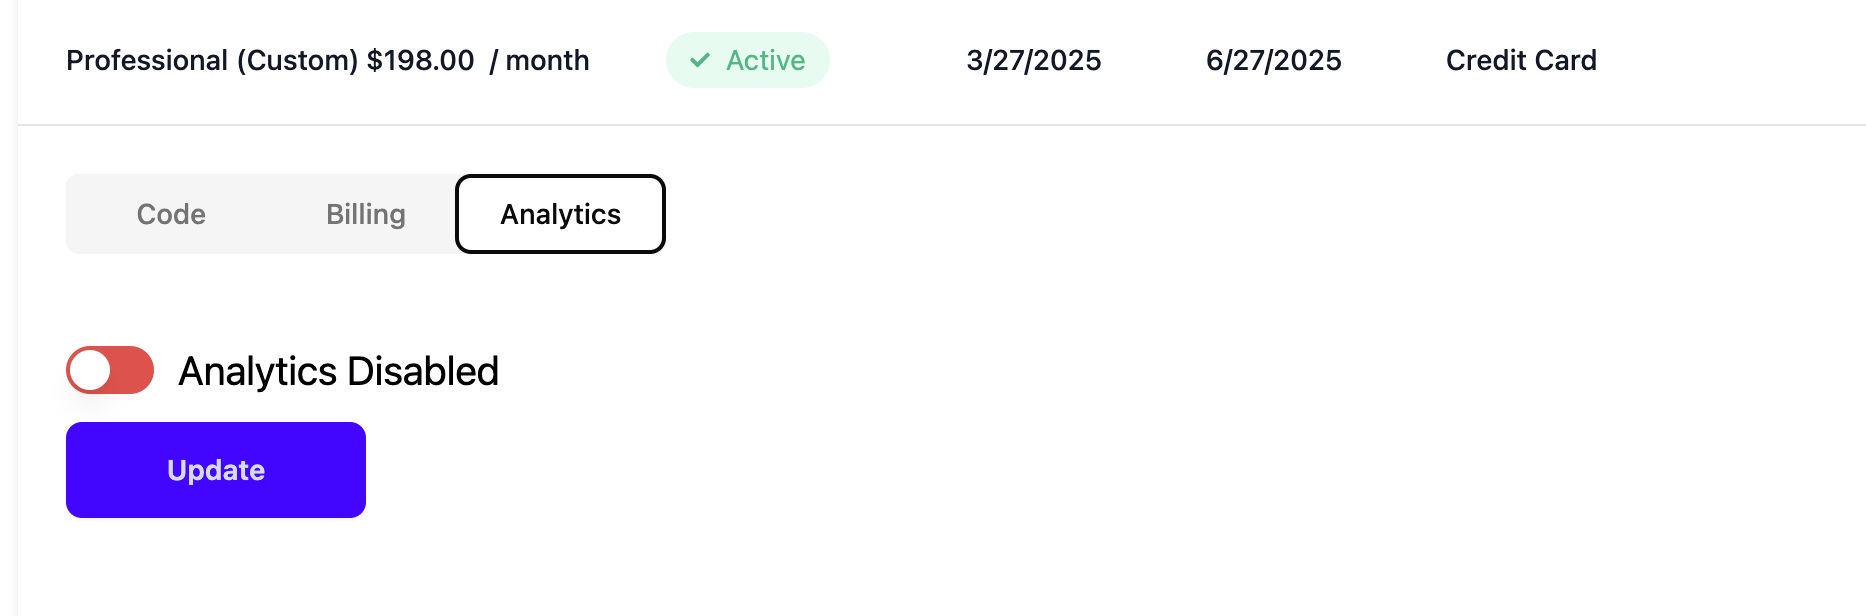
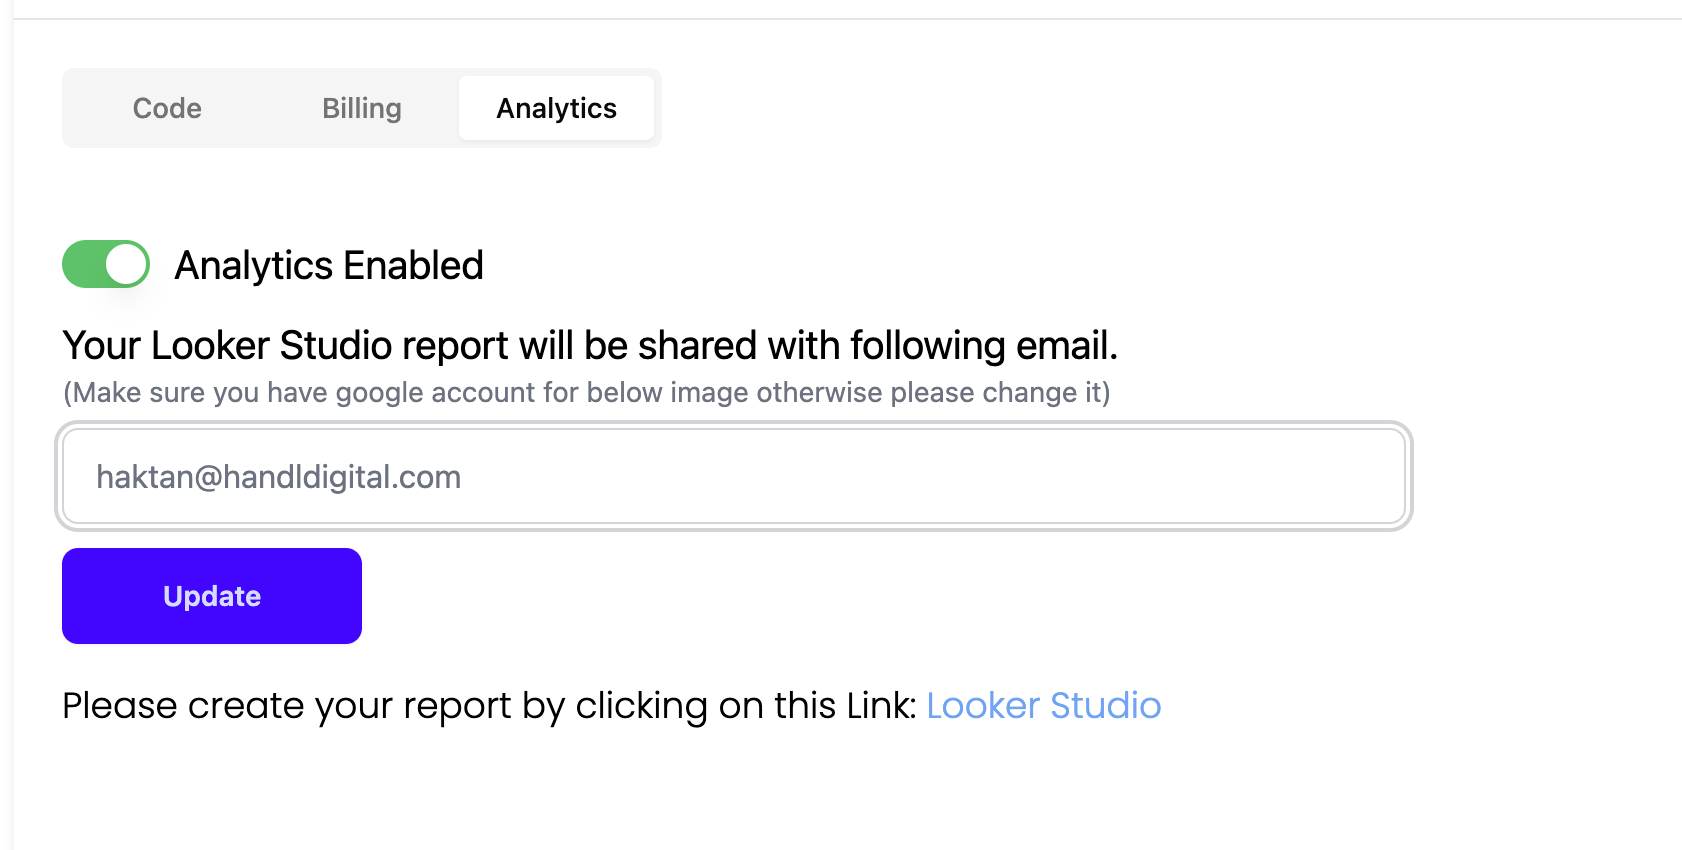
Step 3: Enable Analytics
- If Analytics is disabled, toggle the switch to enable it.
- Enter your preferred email address (must be a Google account) to receive the Looker Studio report.
- Click Update.
Note: Make sure the email you provide is connected to a Google account.
Step 4: Access the Looker Studio Report Link
- Once analytics are enabled and you’ve updated your email, a link labeled Looker Studio will appear.
- Click on this link.
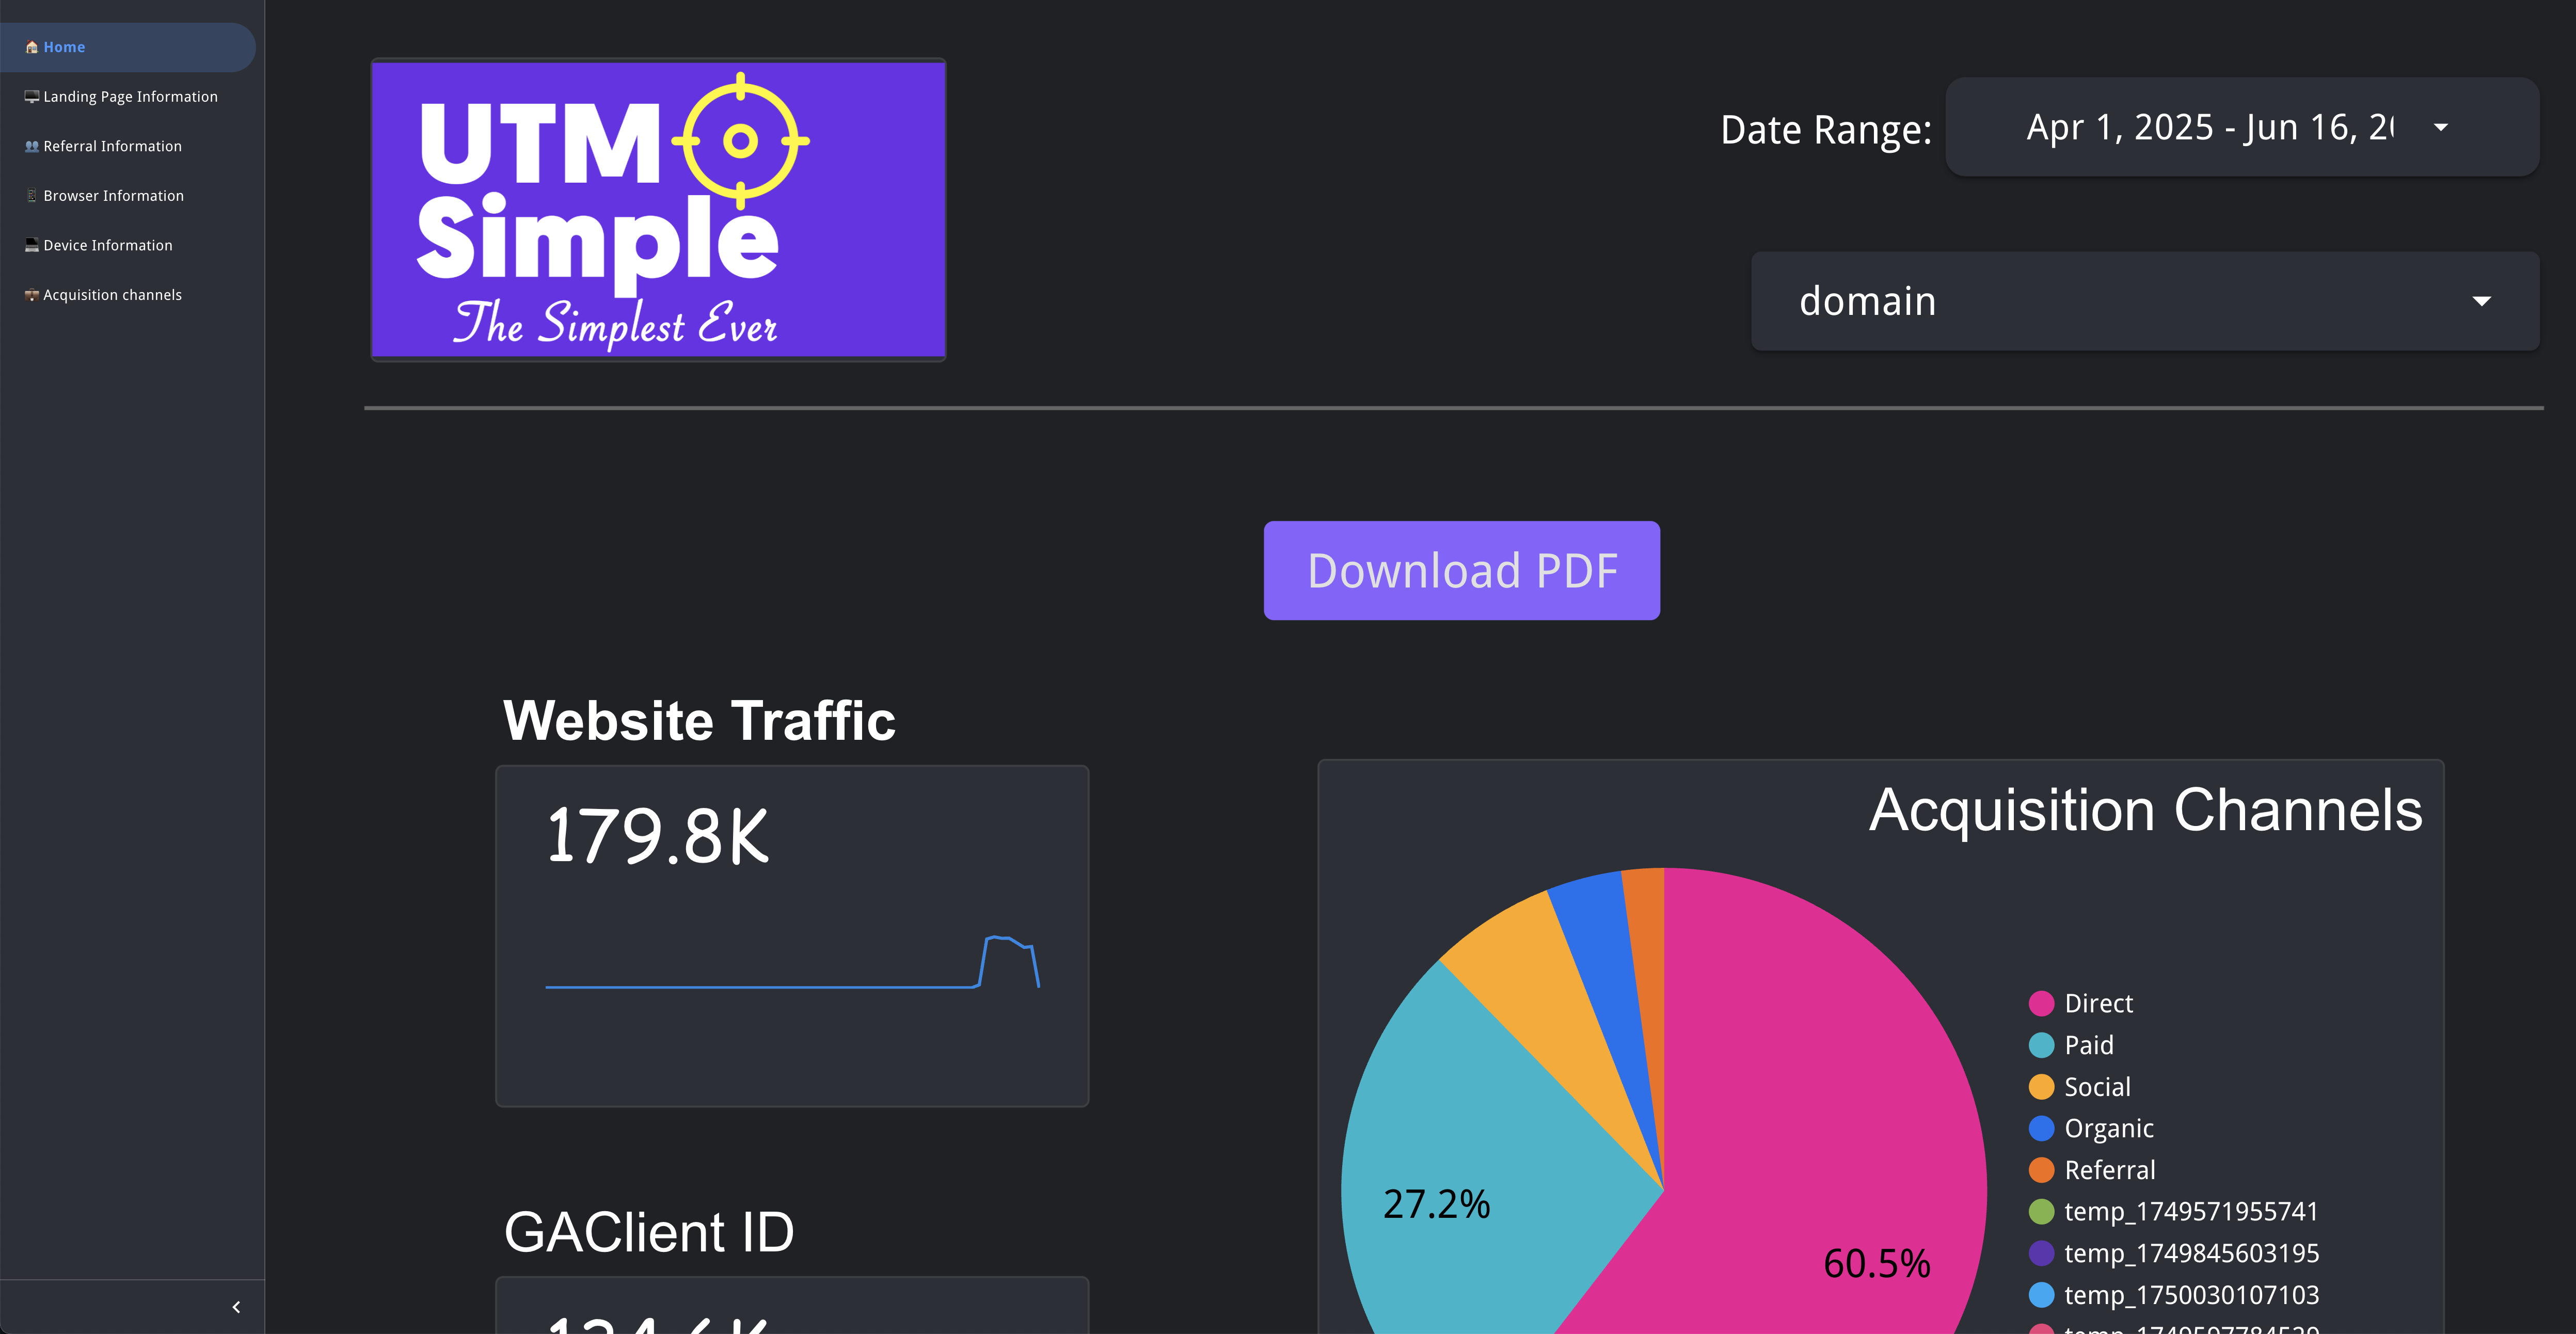
Step 5: View Your Report in Looker Studio
- You will be taken directly to your custom Looker Studio report.
- Explore your traffic, channels, and acquisition analytics.
- Use features like date range selection, filters, and PDF downloads as required.
Troubleshooting
- If you don’t see the link, double-check that Analytics is enabled and your email is correct.
- The Google email provided must have access to Google Looker Studio.
You’re all set! If you have any issues, contact support via the options in your UTMSimple dashboard.